


All vanilla extracts are NOT created equally. Once you taste the pure flavor of good vanilla, it’s hard to turn back. Unfortunately, a small bottle of artisanal extract can run upwards of $10. So, make it yourself! It’s as easy as vanilla beans + vodka. Yes, you heard correctly! Vodka. Check a store-bought bottle of vanilla extract in your pantry, and the ingredient list will read: “vanilla, alcohol” (and maybe some other junk).
Varieties
You might have heard of Bourbon vanilla and just thought, “oh, that must be made with Bourbon instead of vodka.” But that’s not the case. The most common type of vanilla, V. planifolia, is commonly known as Bourbon vanilla or Madagascar vanilla. It comes from an orchid plant that’s largely grown in Madagascar and Mexico (there are slight differences in flavor between the two origins, but it’s the same plant). There’s a less common variety of vanilla beans grown in Tahiti, V. tahitensis, that tastes different from what you probably associate with vanilla flavor.
Alcohol
On the topic of alcohol, make sure whatever you use is no more than 40-50% alcohol, or else your final product will still taste strongly of alcohol (which is only a problem in things that aren’t baked). One time, a guy in the liquor store who supposedly went to culinary school talked me into buying Everclear for vanilla extract. It was a bad decision. I still have half of that bottle hanging out in a dusty corner of my bar years later. Vodka results in the purest extract, and a cheap bottle will work just fine! Just go ahead and tell the liquor store clerk to stop judging you for buying a $10 handle of vodka.
Sourcing
I source my vanilla beans from Vanilla Saffron Imports. They have very good prices (relatively) for certified organic, properly sun-dried vanilla beans. I’ve ordered from them multiple times, and I’ve been pleased each time! For reference, I got 39 beans in a quarter pound package of planifolia.
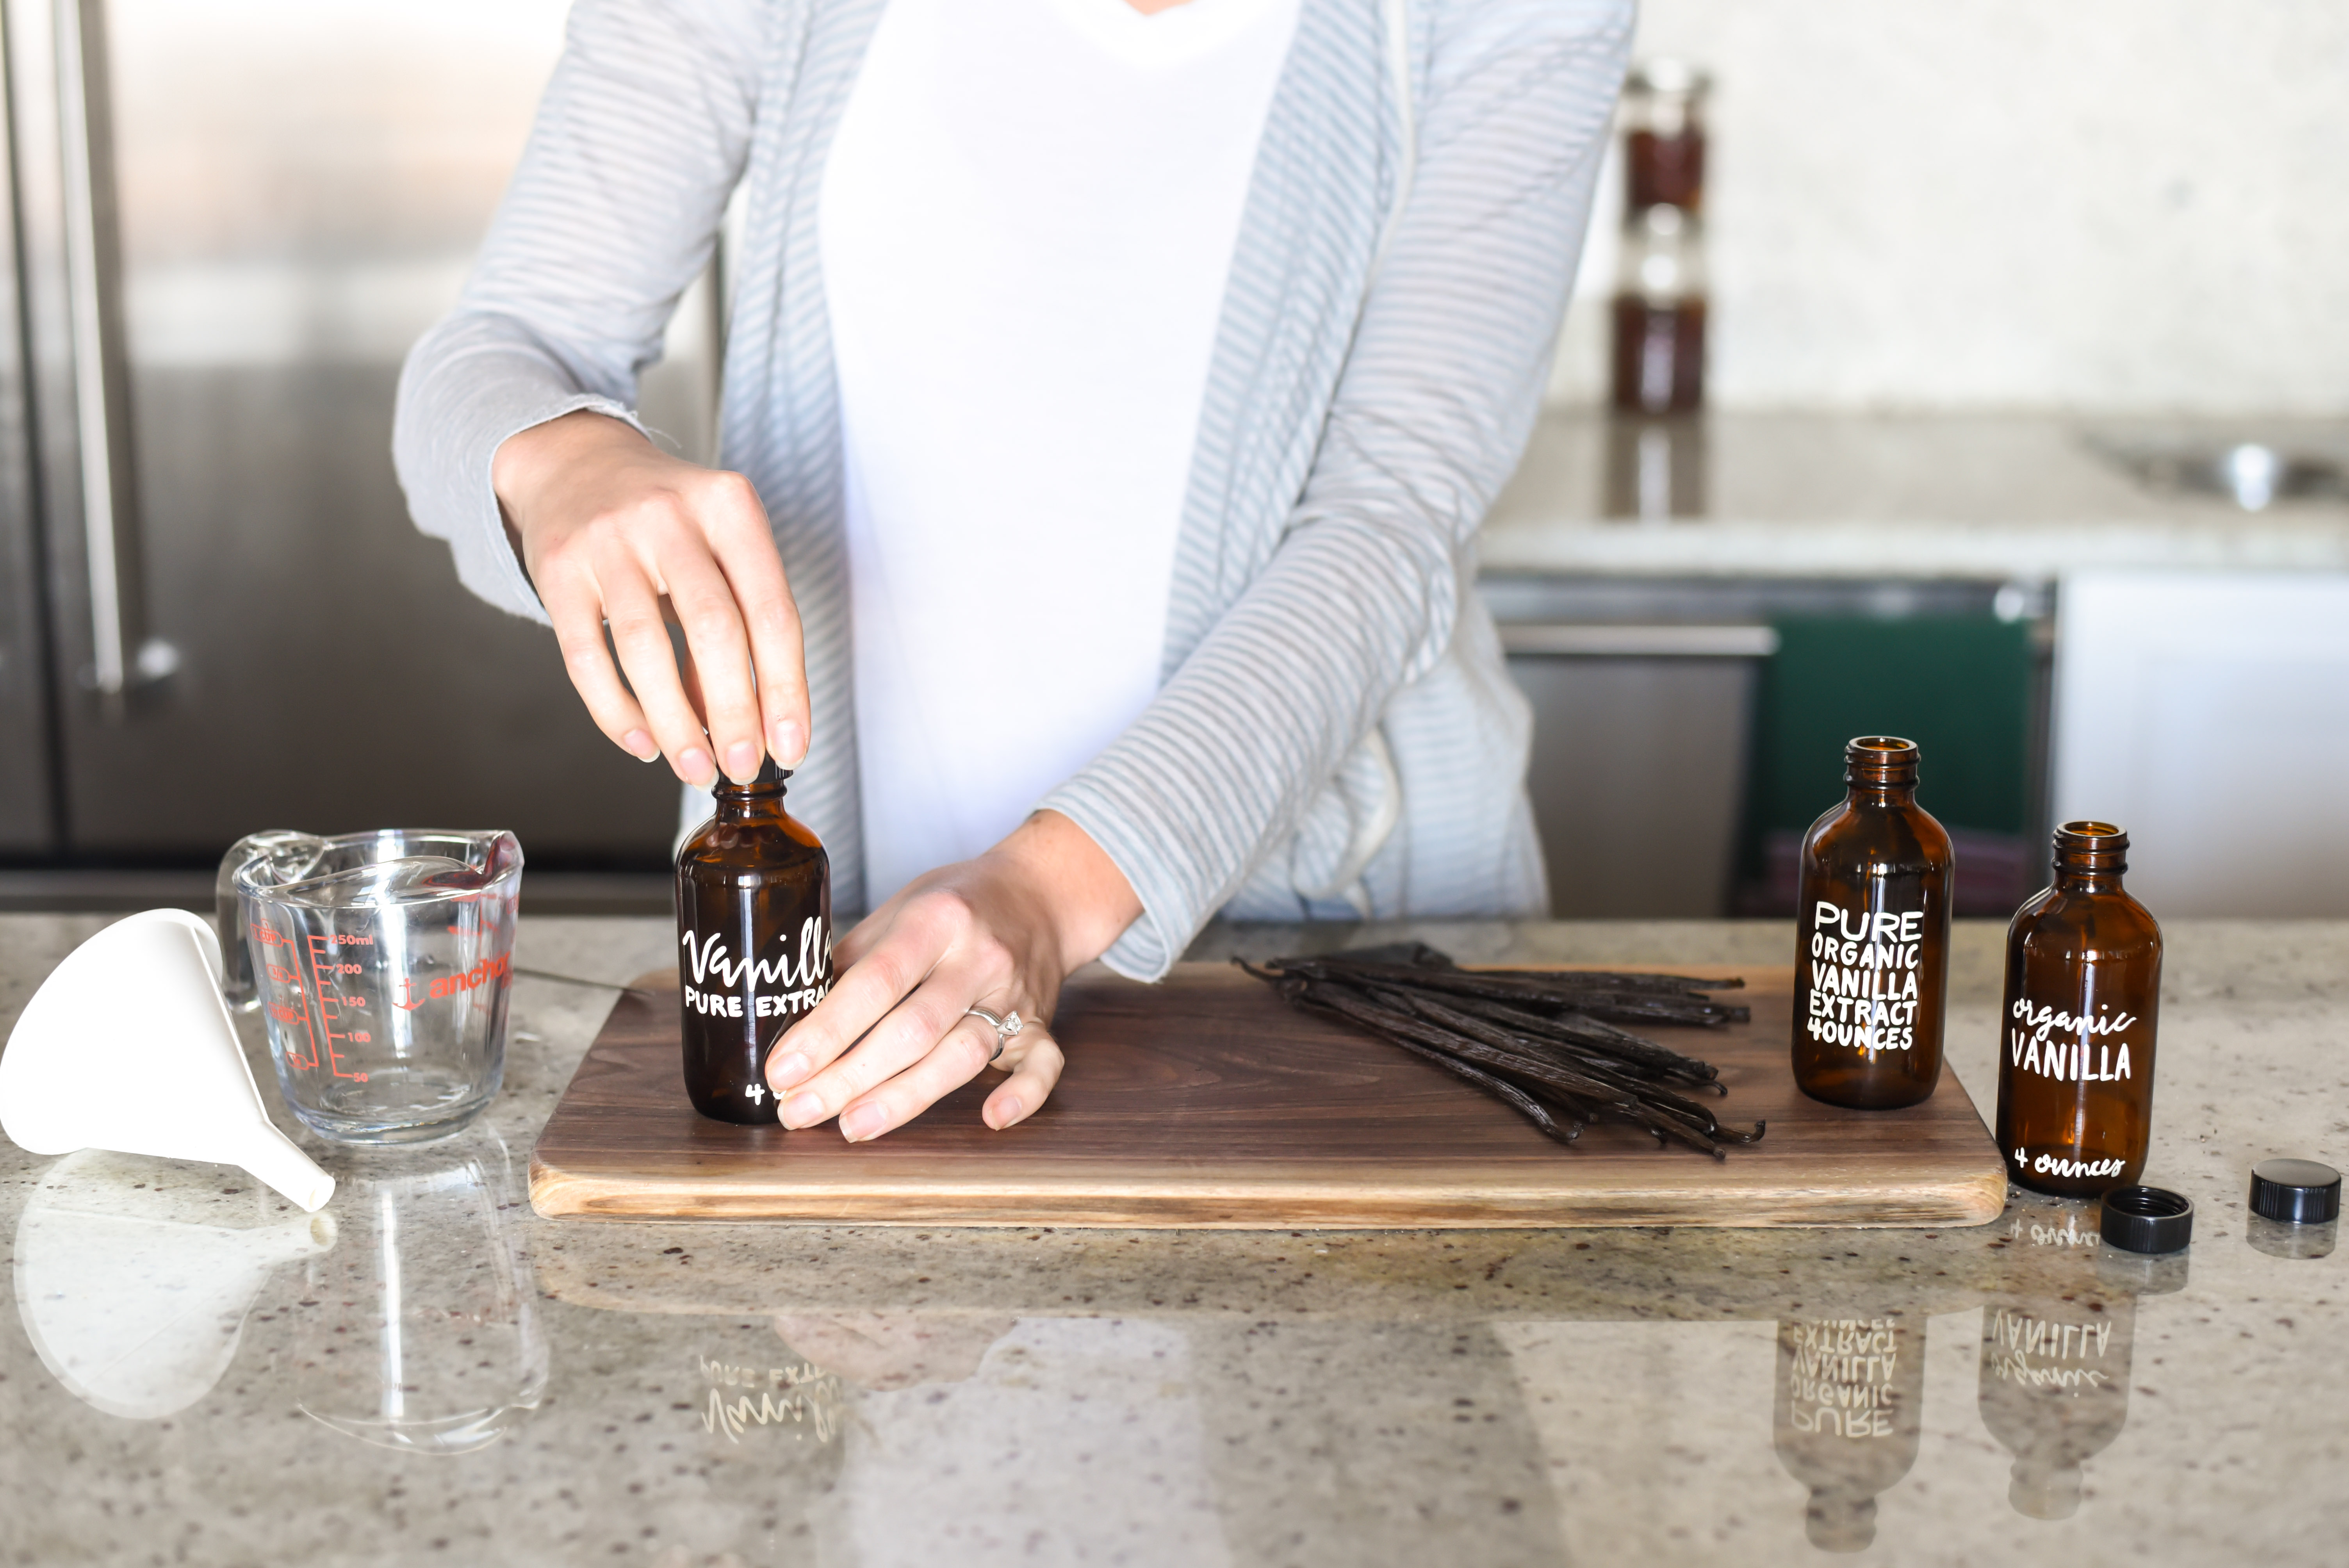
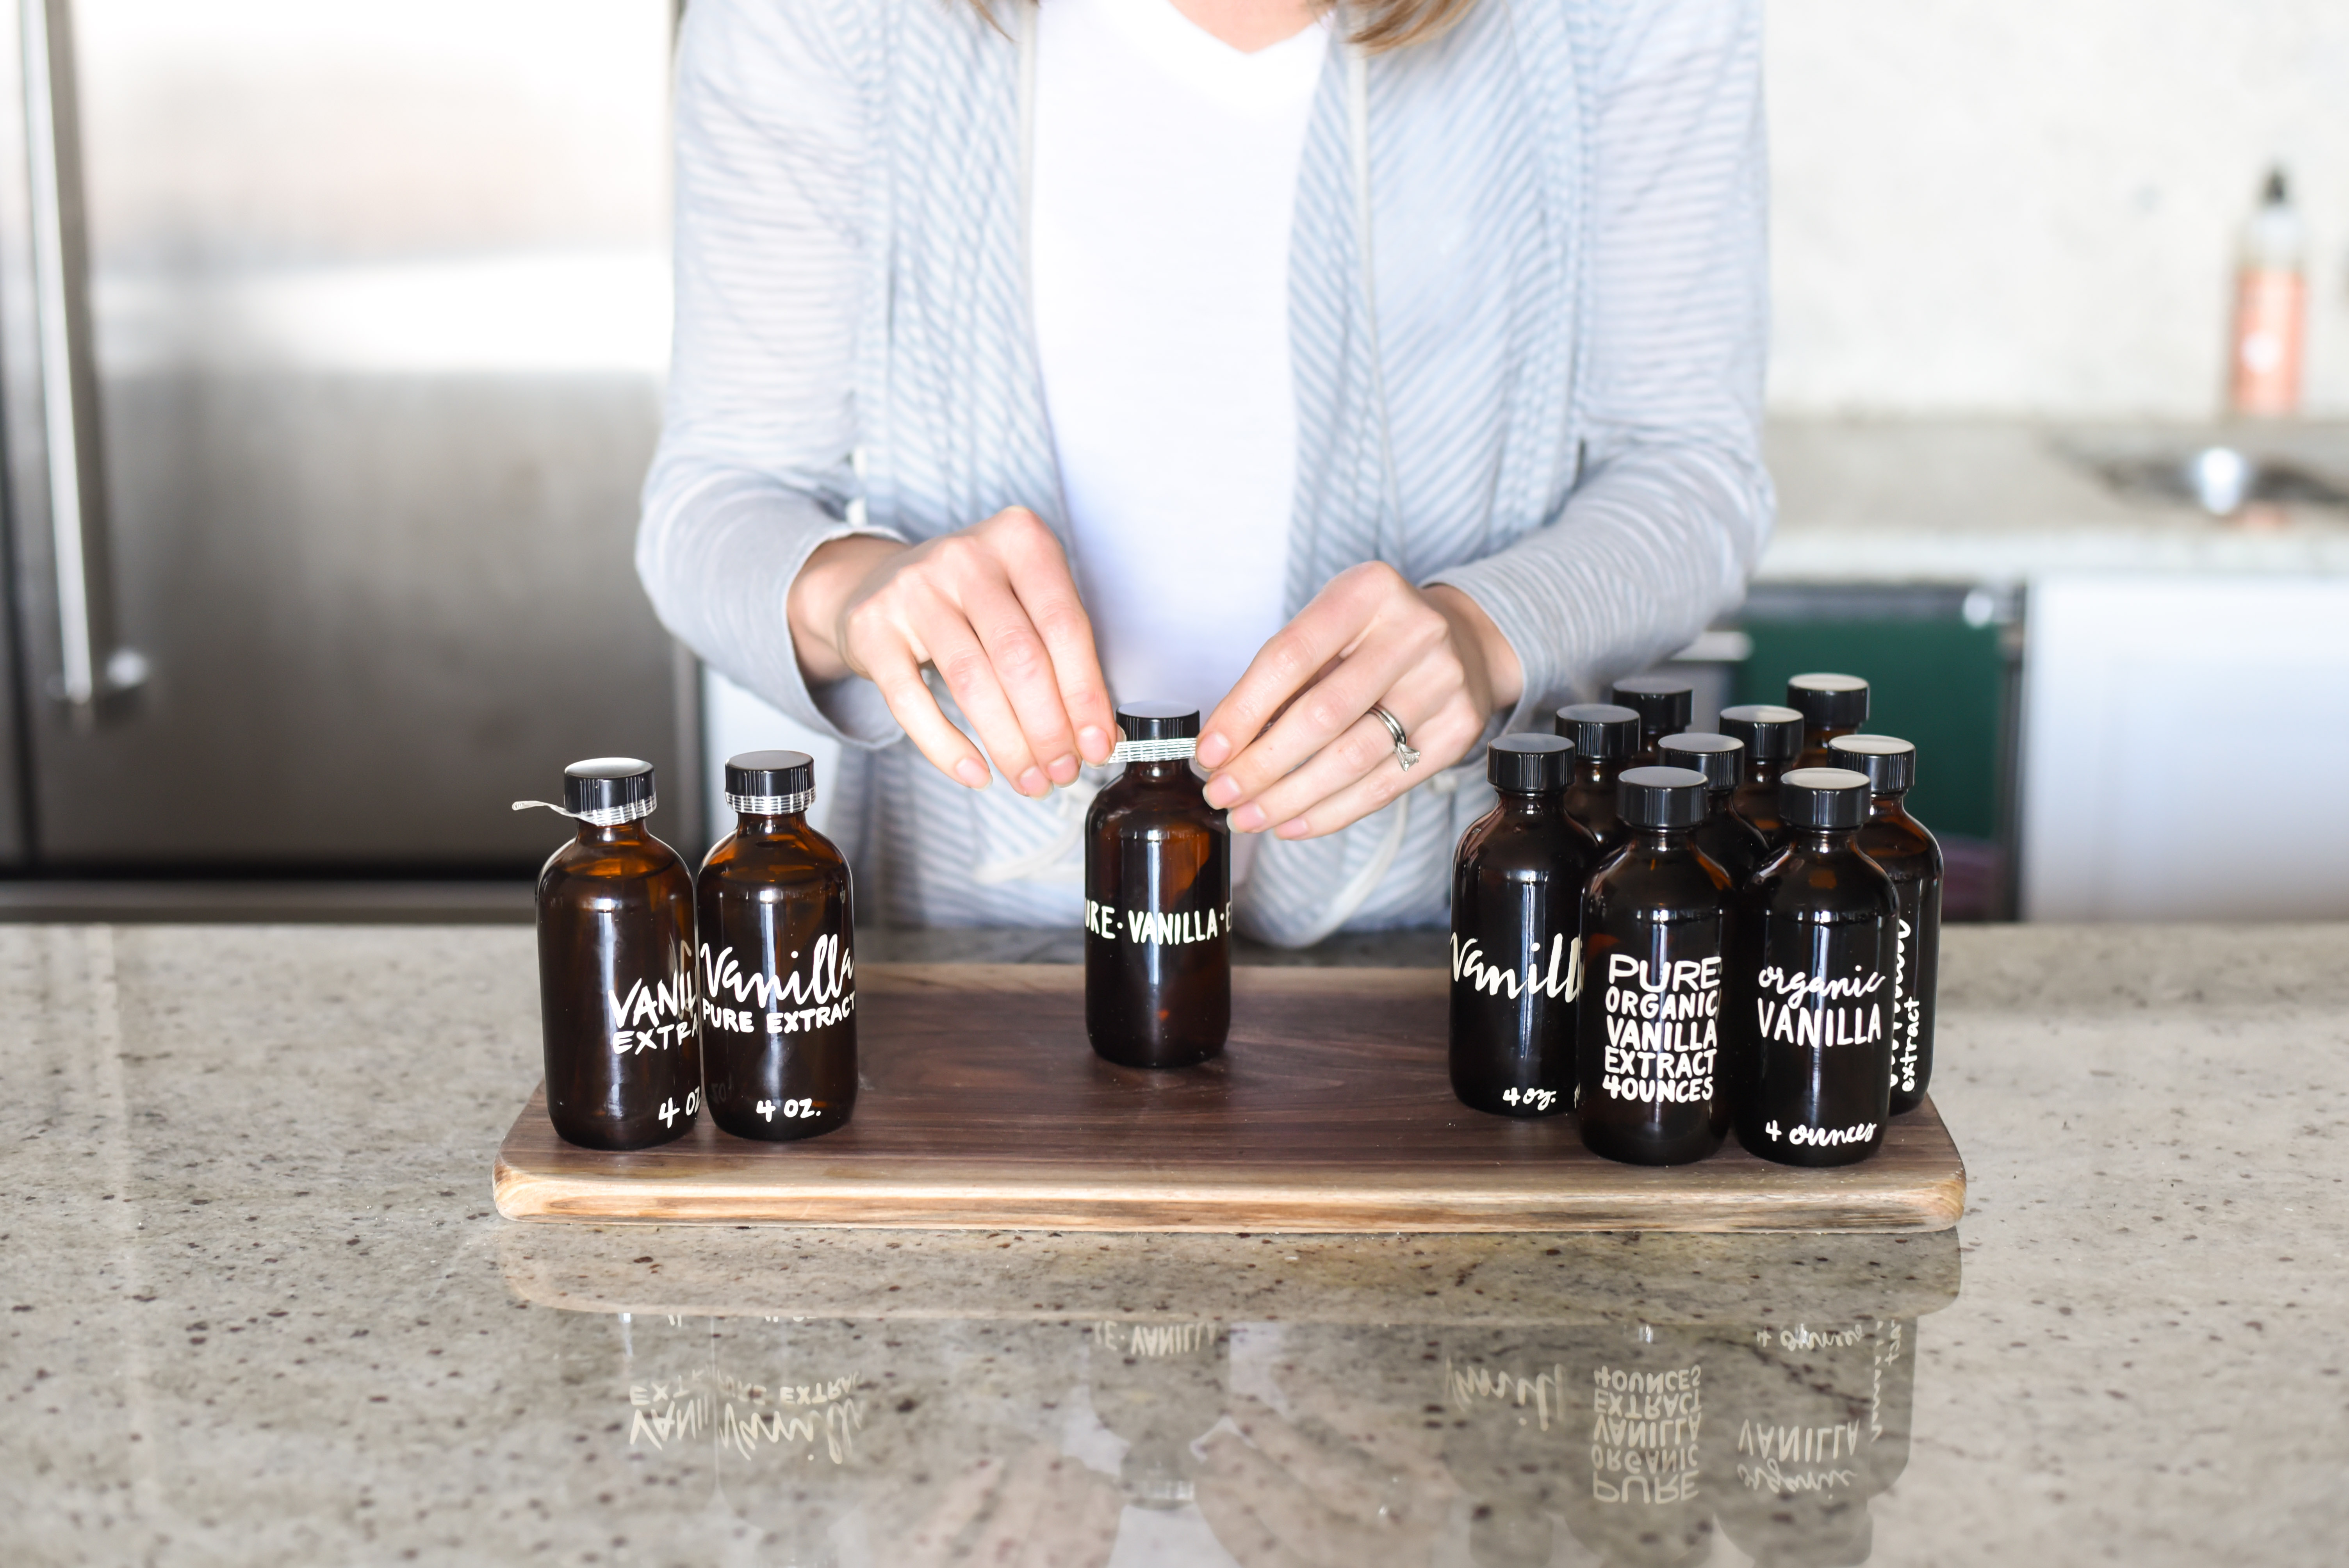
The bottles are important. Sunlight can degrade the quality of the extract over time, so it’s best to put it in dark bottles. I prefer amber bottles because it’s more or less the same color as the extract. For several different projects, I’ve ordered bottles online from Specialty Bottle, and I’ve been very satisfied. Specifically for vanilla, I get the 4 oz. Amber Boston Round bottles with black lids. The quality is good, and at $0.82 each, the price is good, too. I wrote the recipe for 12 bottles, but the good news is that the price per bottle goes down as the quantity goes up.
Making them pretty
I love making this for myself, but it’s also one of my favorite food gifts to give! Unlike most perishable goods that are exchanged at Christmas, this lets the recipient use it on their own time. You can tie on a recipe card that calls for vanilla extract, or package it with other baking supplies/tools! It’s also a fun hostess gift if you’re attending lots of parties.
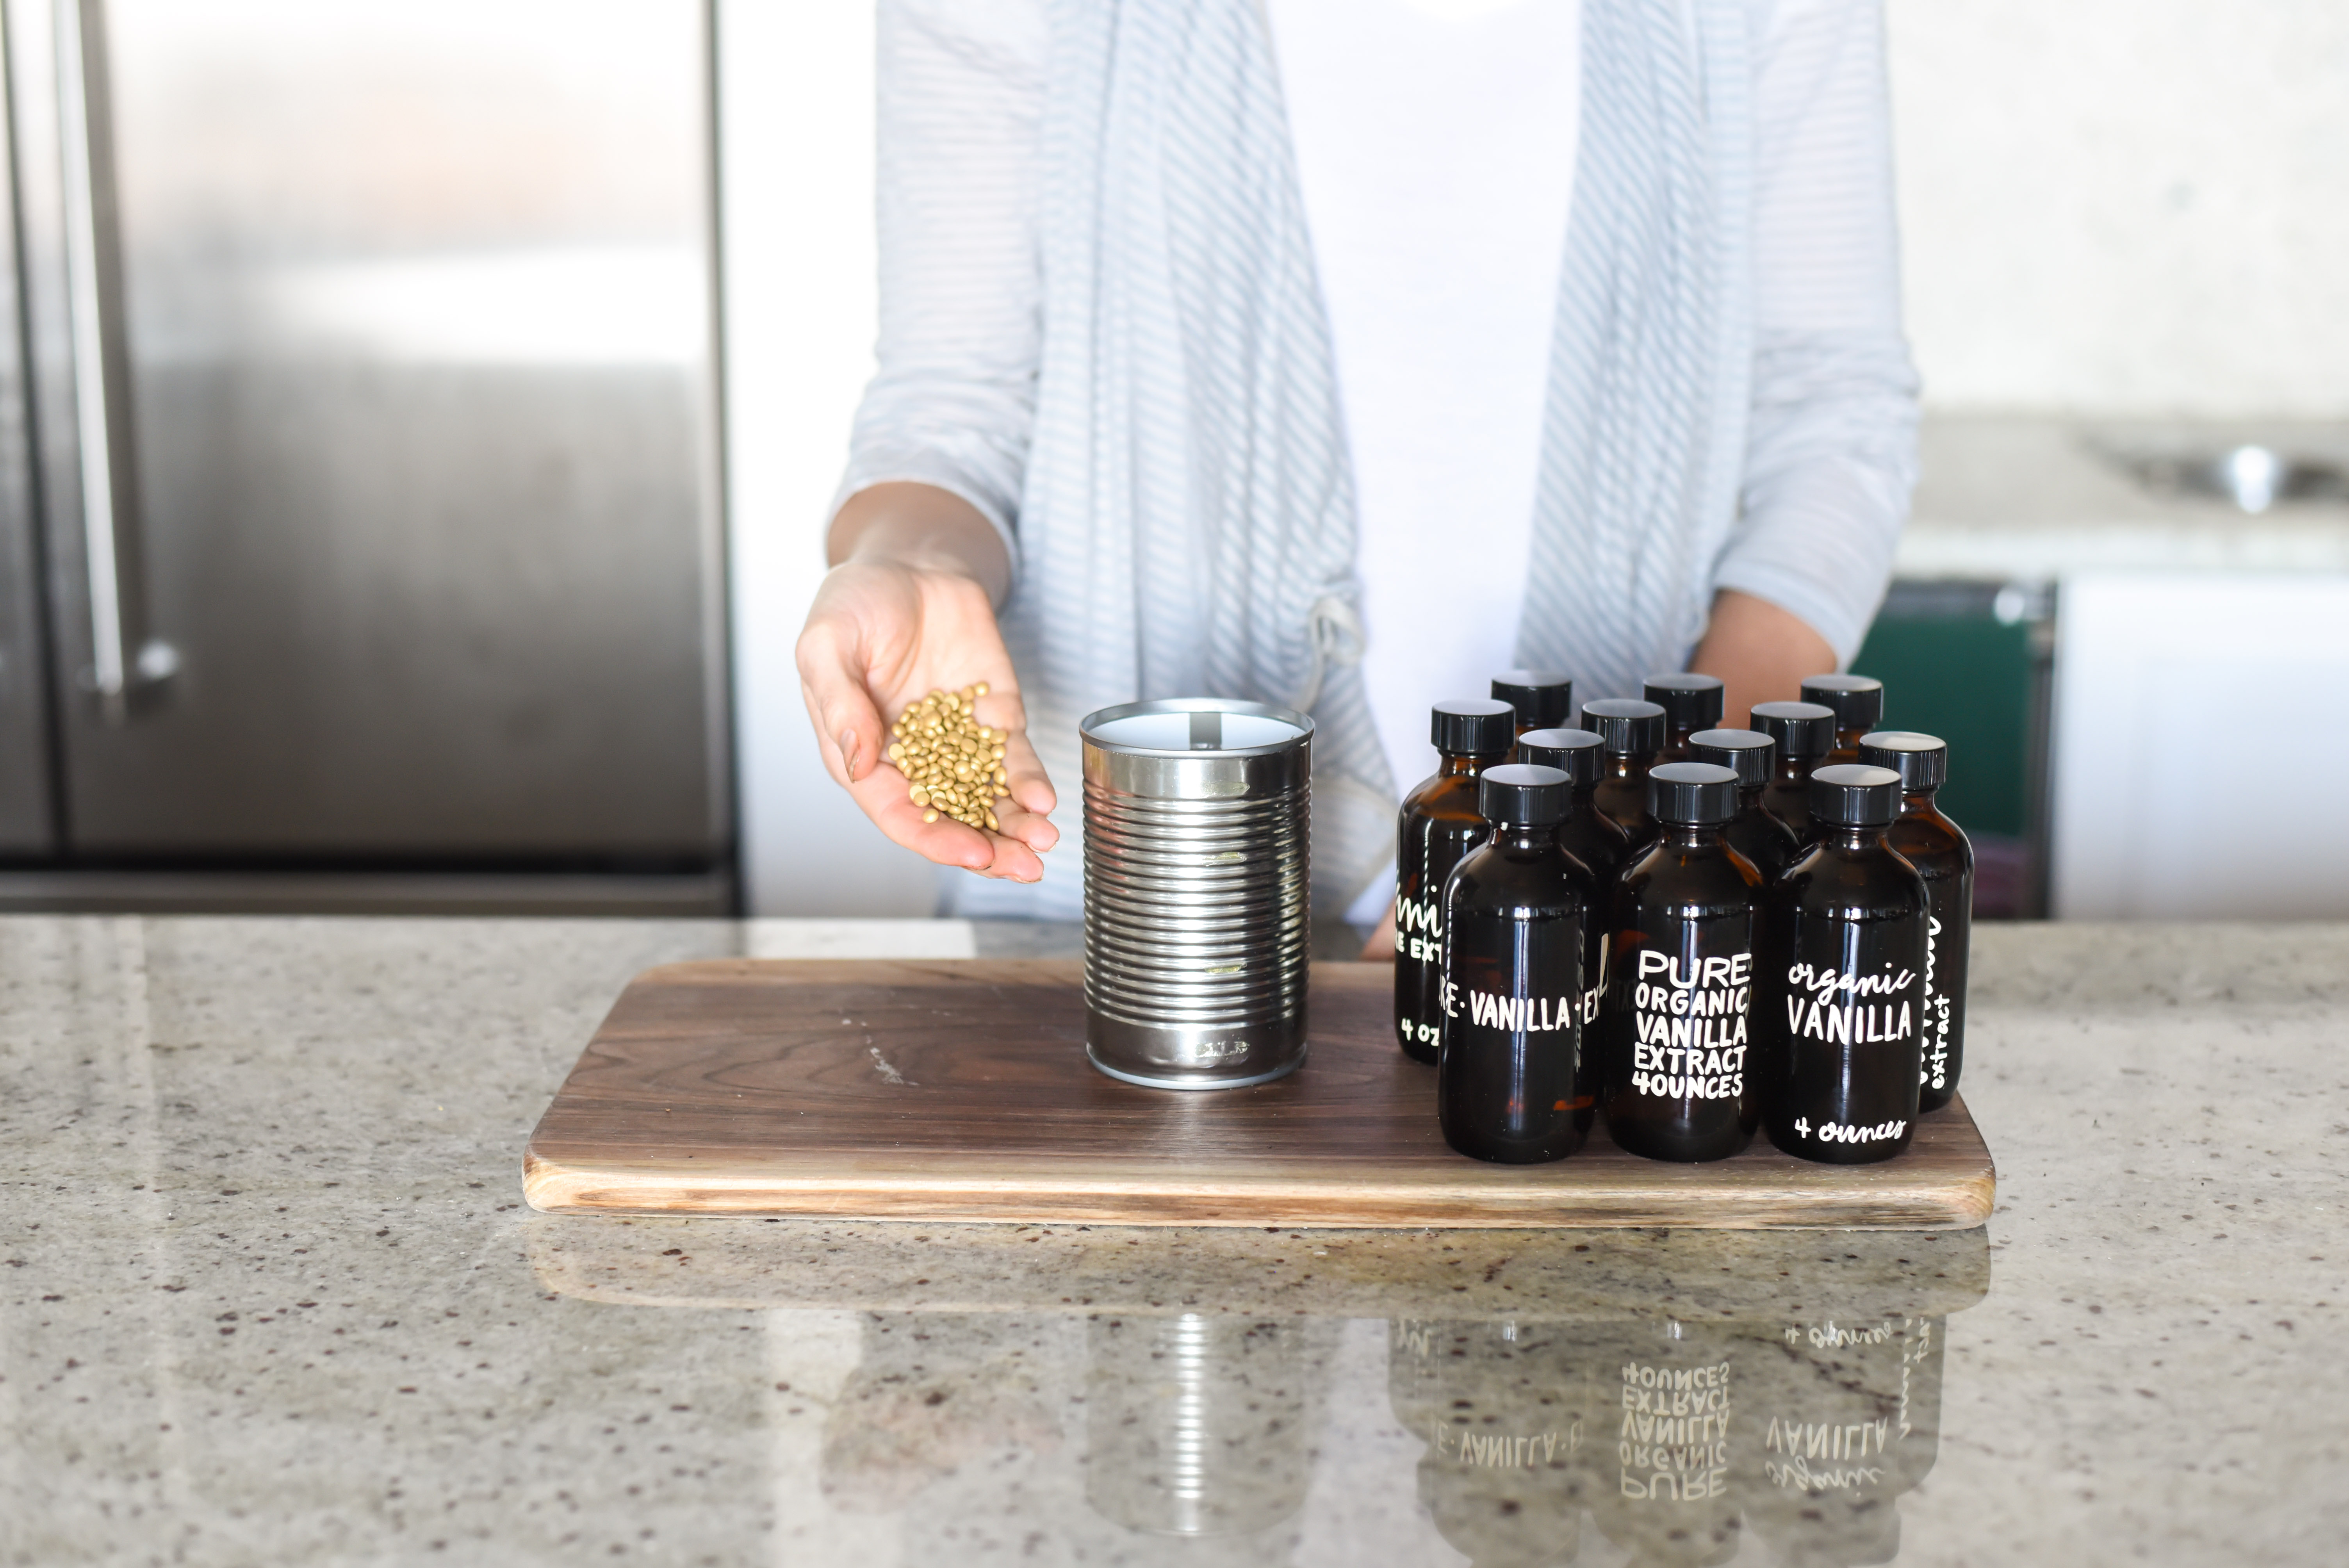
The extract is best after sitting for a month, so it’s good to get started early. But a “best after” tag works if you’re late to the game. You can put as much or as little effort as you want into making the bottles pretty. A printed or handwritten sticker label is easy, or you can paint directly on the bottles with glass paint (as I did). I went a little overboard this year and finished mine with gold bottle sealing wax* because… heart eyes for gold. A little piece of filament tape (also called strapping tape) around the lid allows for easy removal of the wax. If you can’t find narrow tape, cut a larger roll into long strips. I found mine at a home improvement store in the moving supplies section. It’s also available online
.*
Click through these photos for step-by-step visuals:

Homemade Vanilla Extract

Ingredients
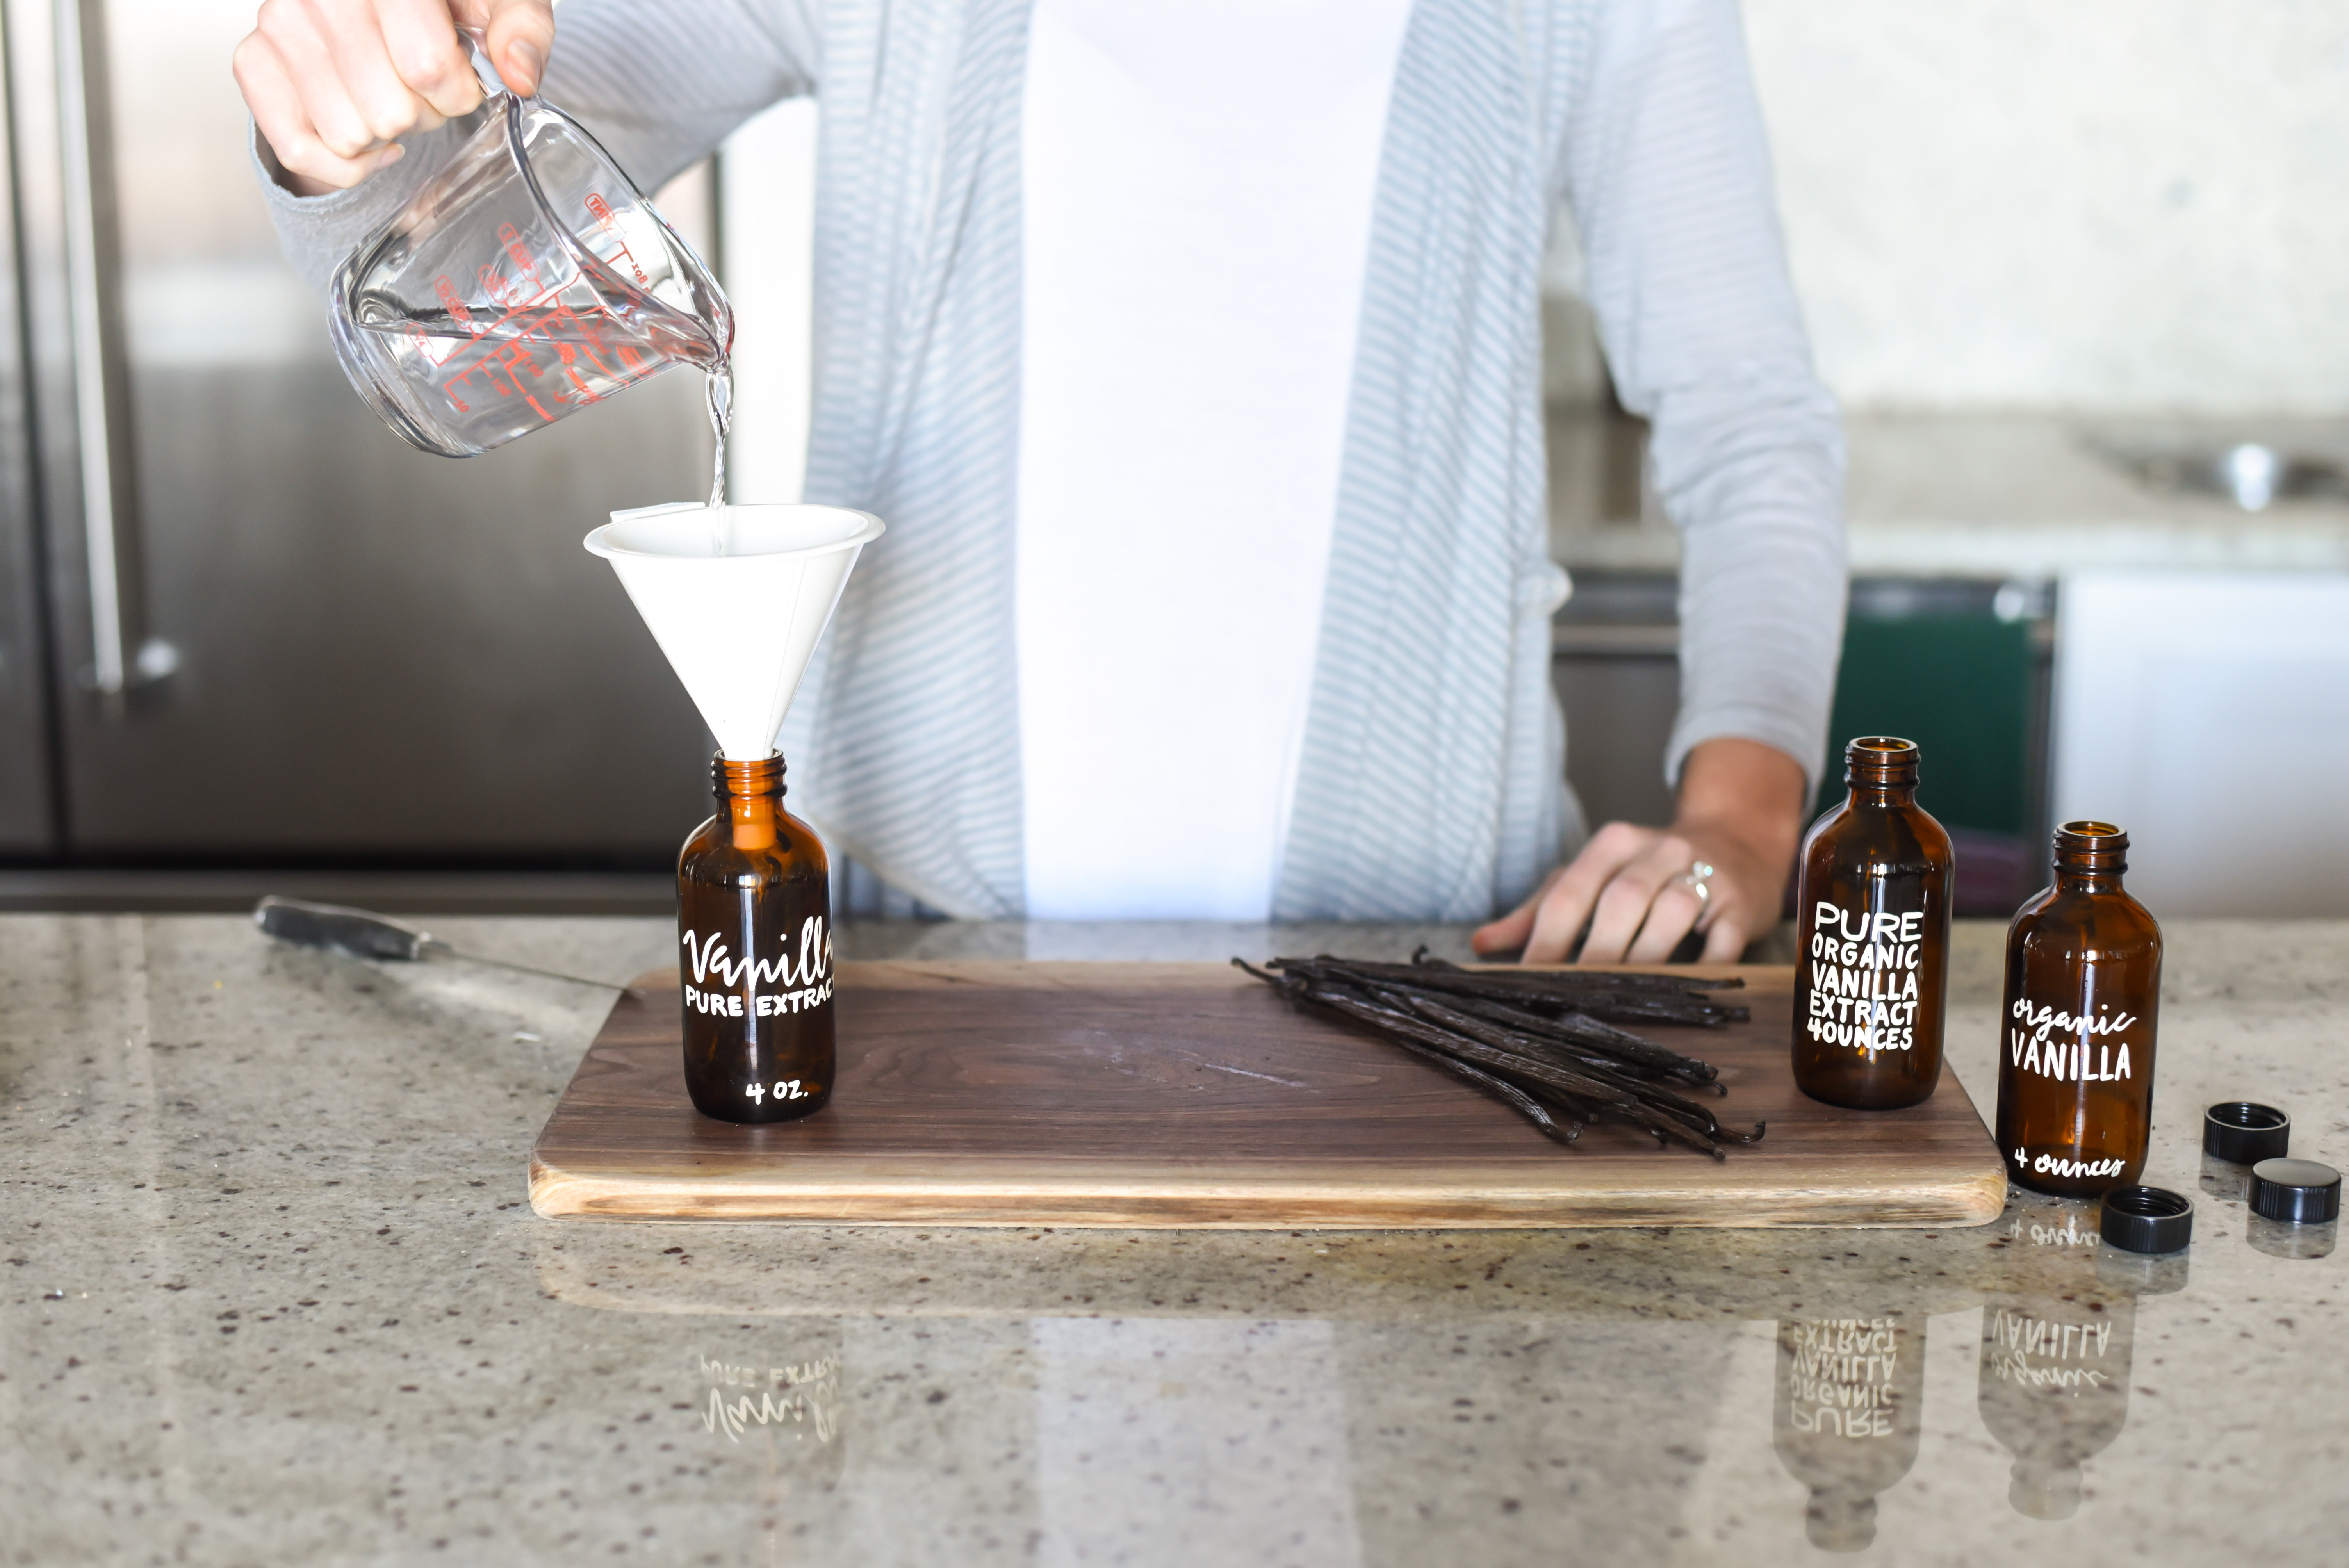
- 48 oz. cheap vodka
- 24 vanilla beans
Supplies:
- 4 oz. amber Boston bottles + lids
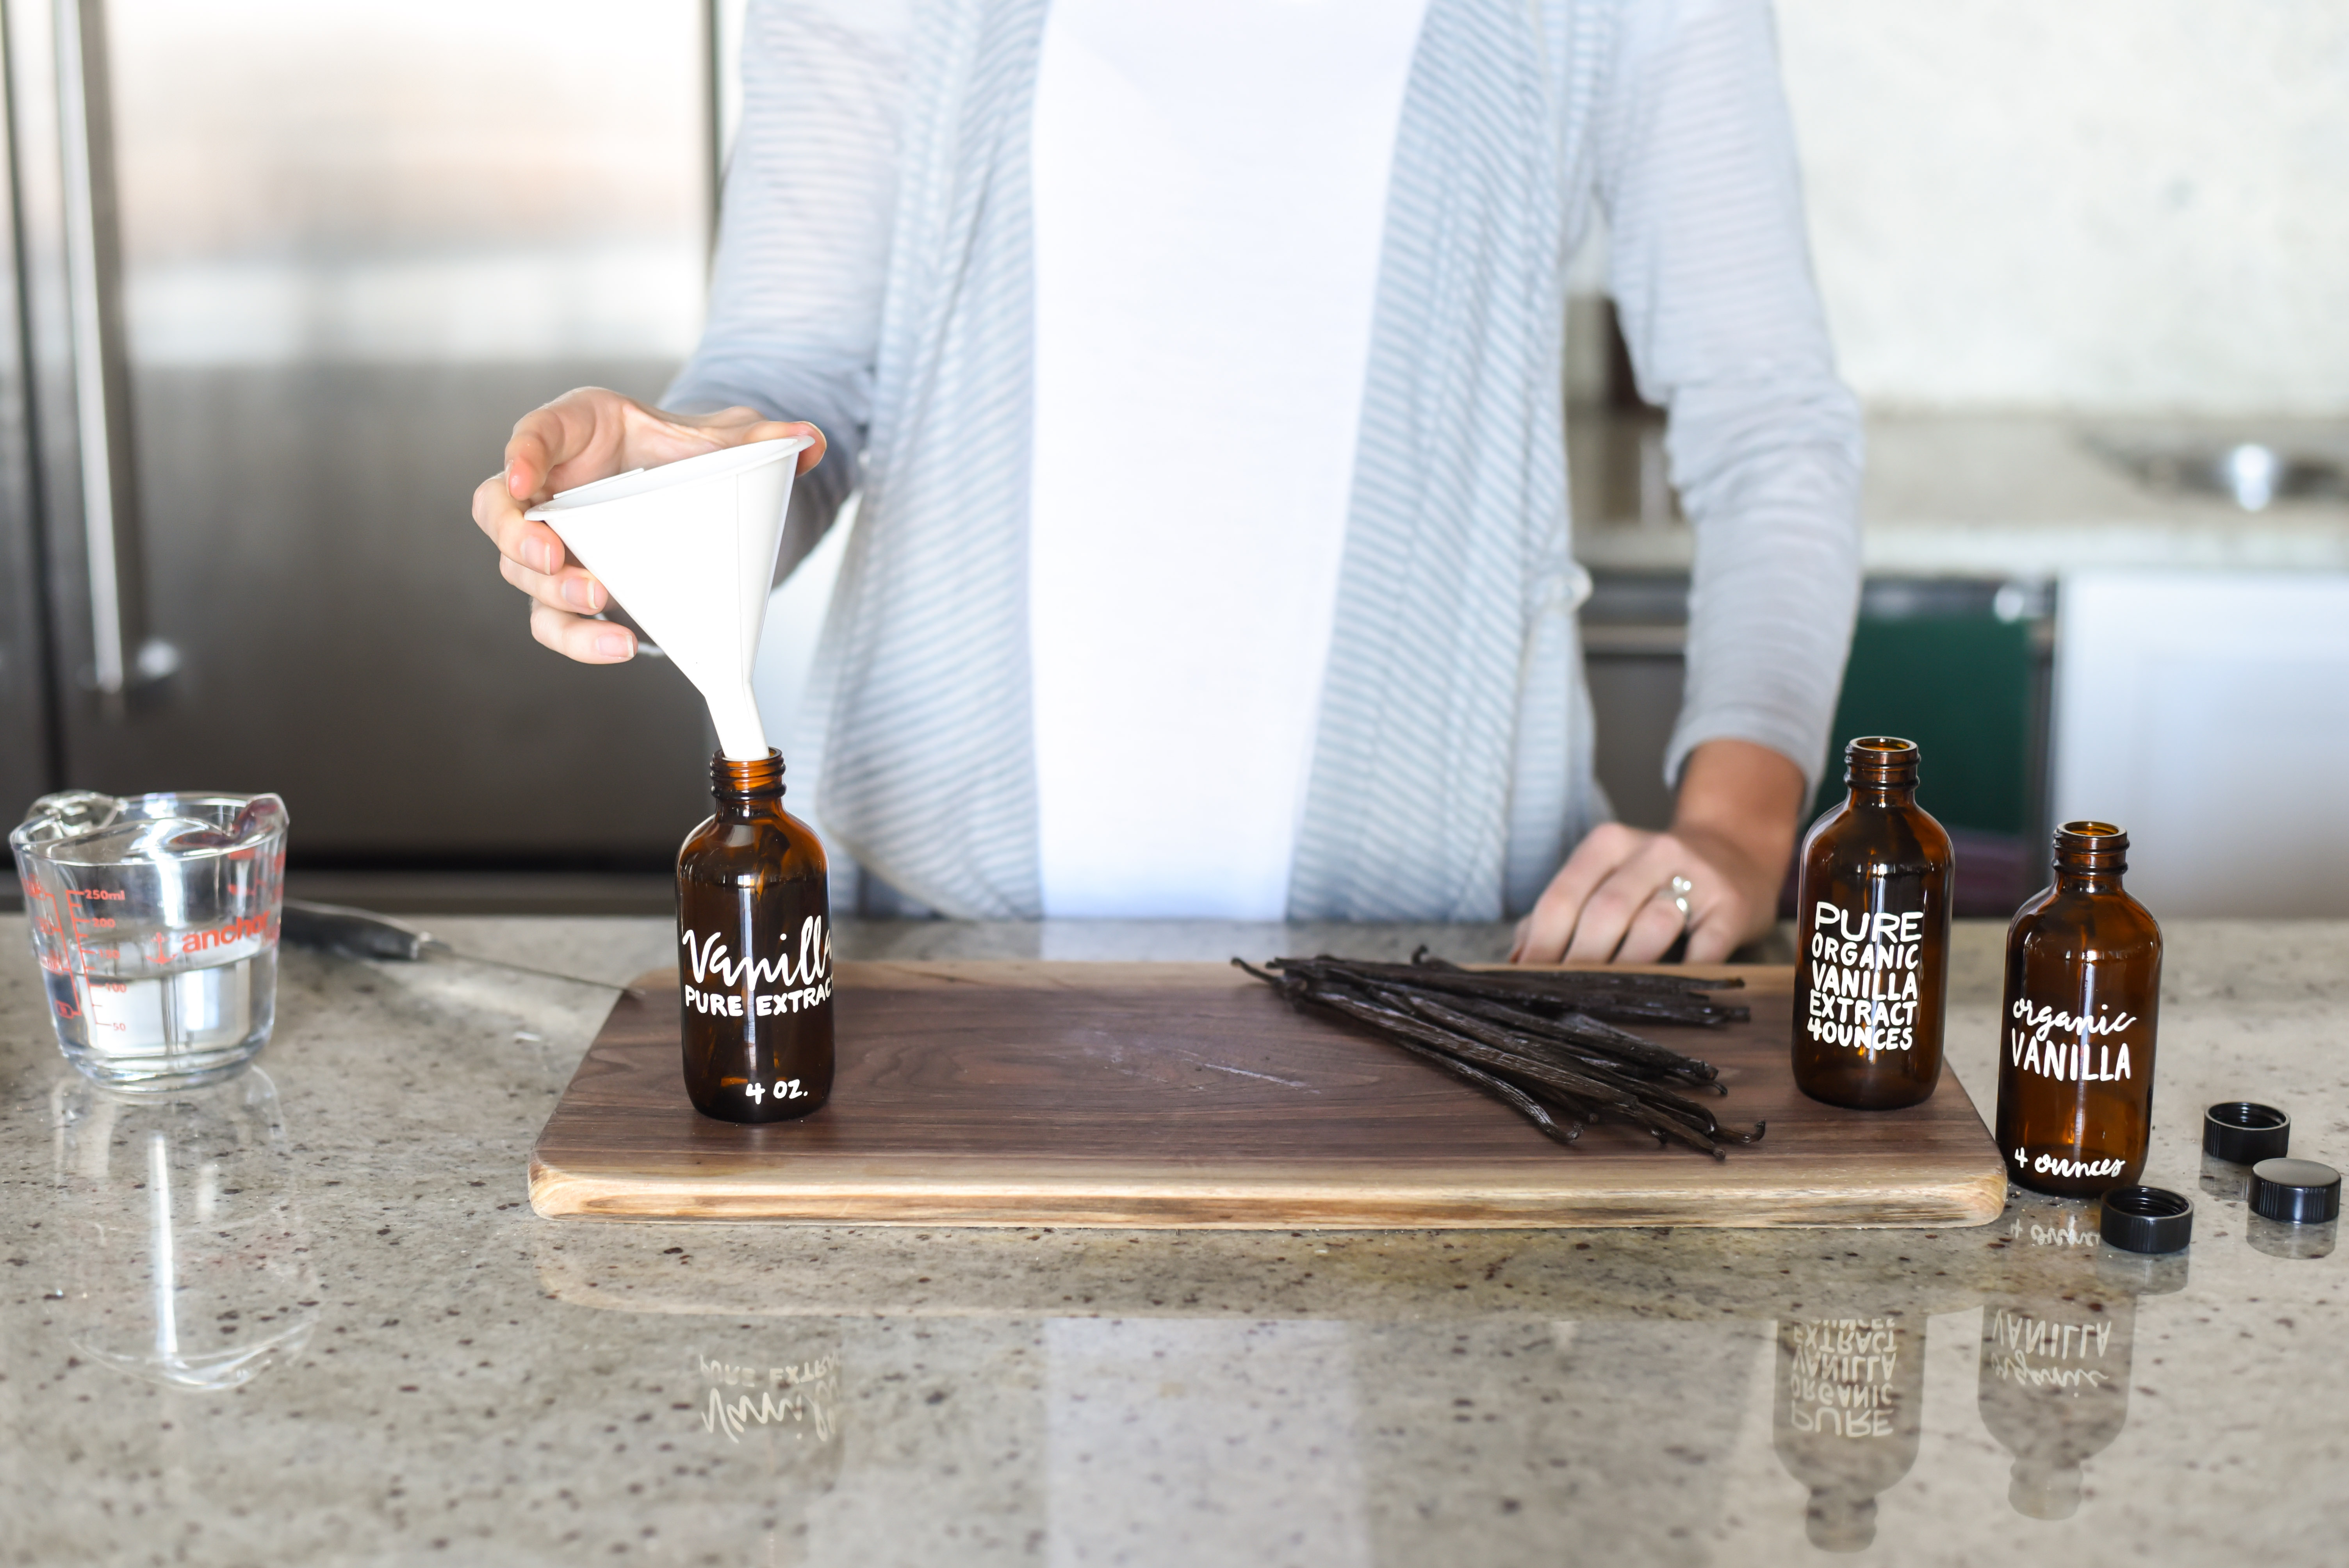
- Funnel
- Sticker labels or glass paint
Optional:
- Filament or “strapping” tape
- Clean tin can
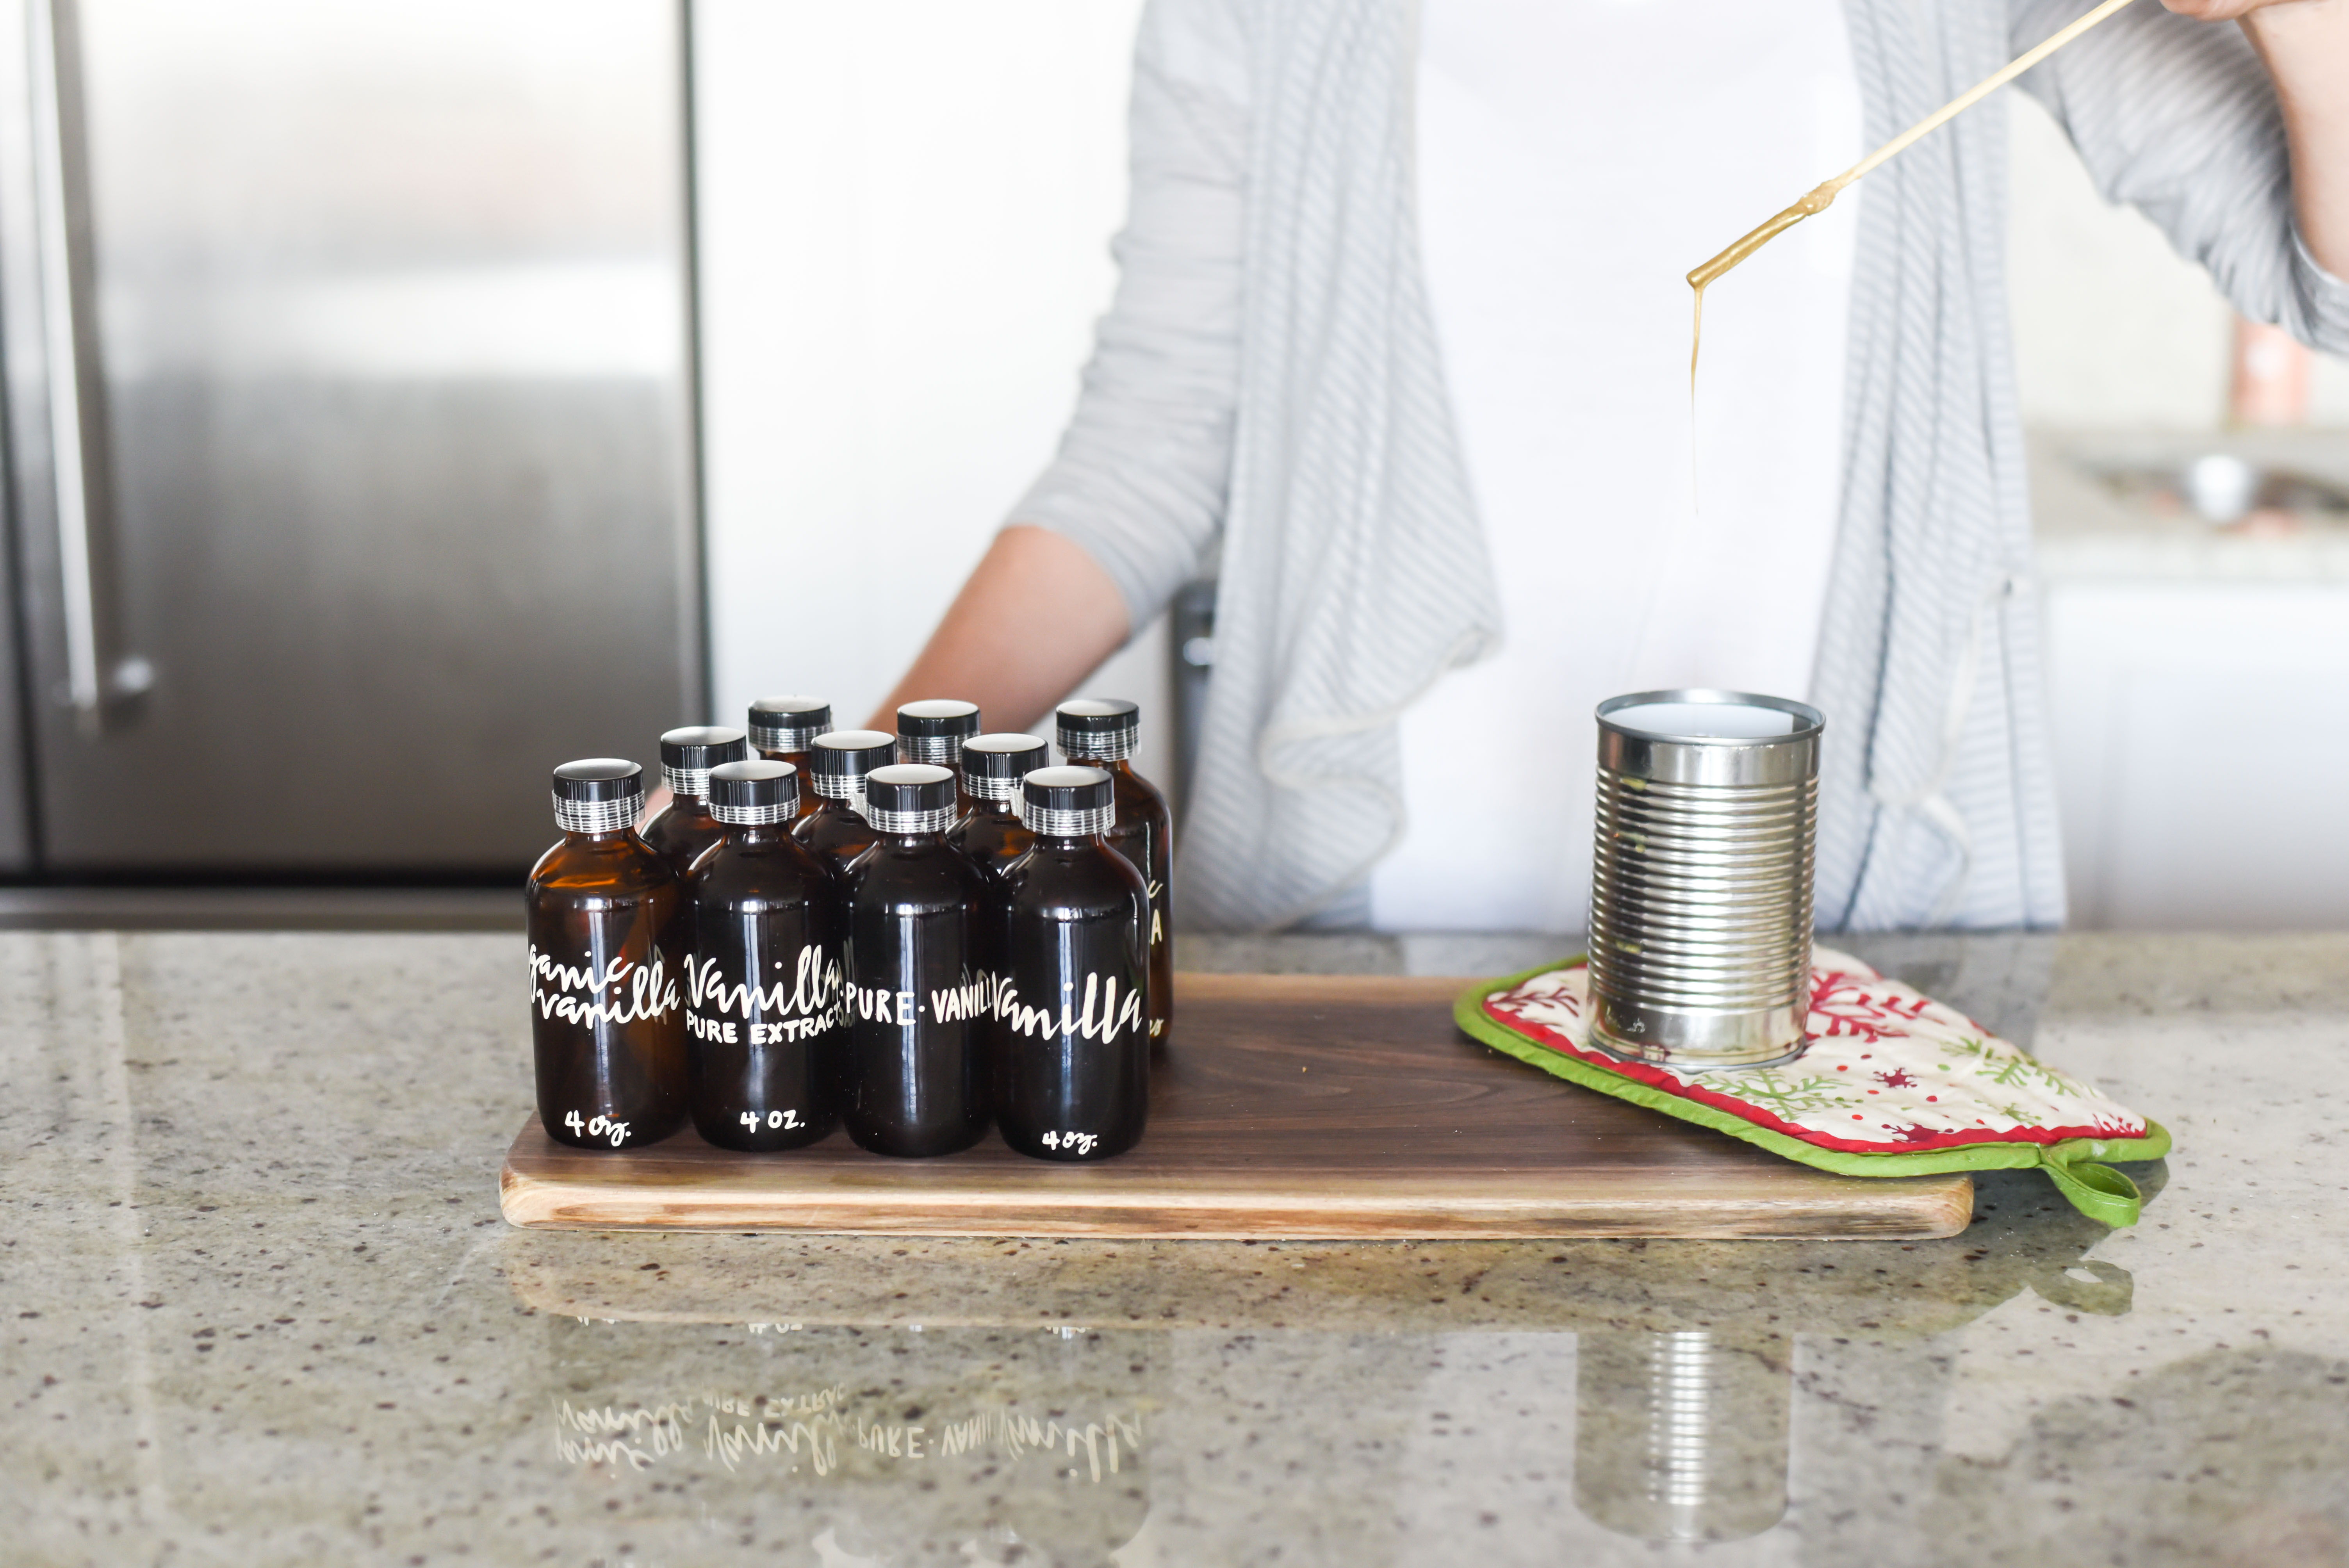
- Bottle sealing wax
- Skewer
Instructions
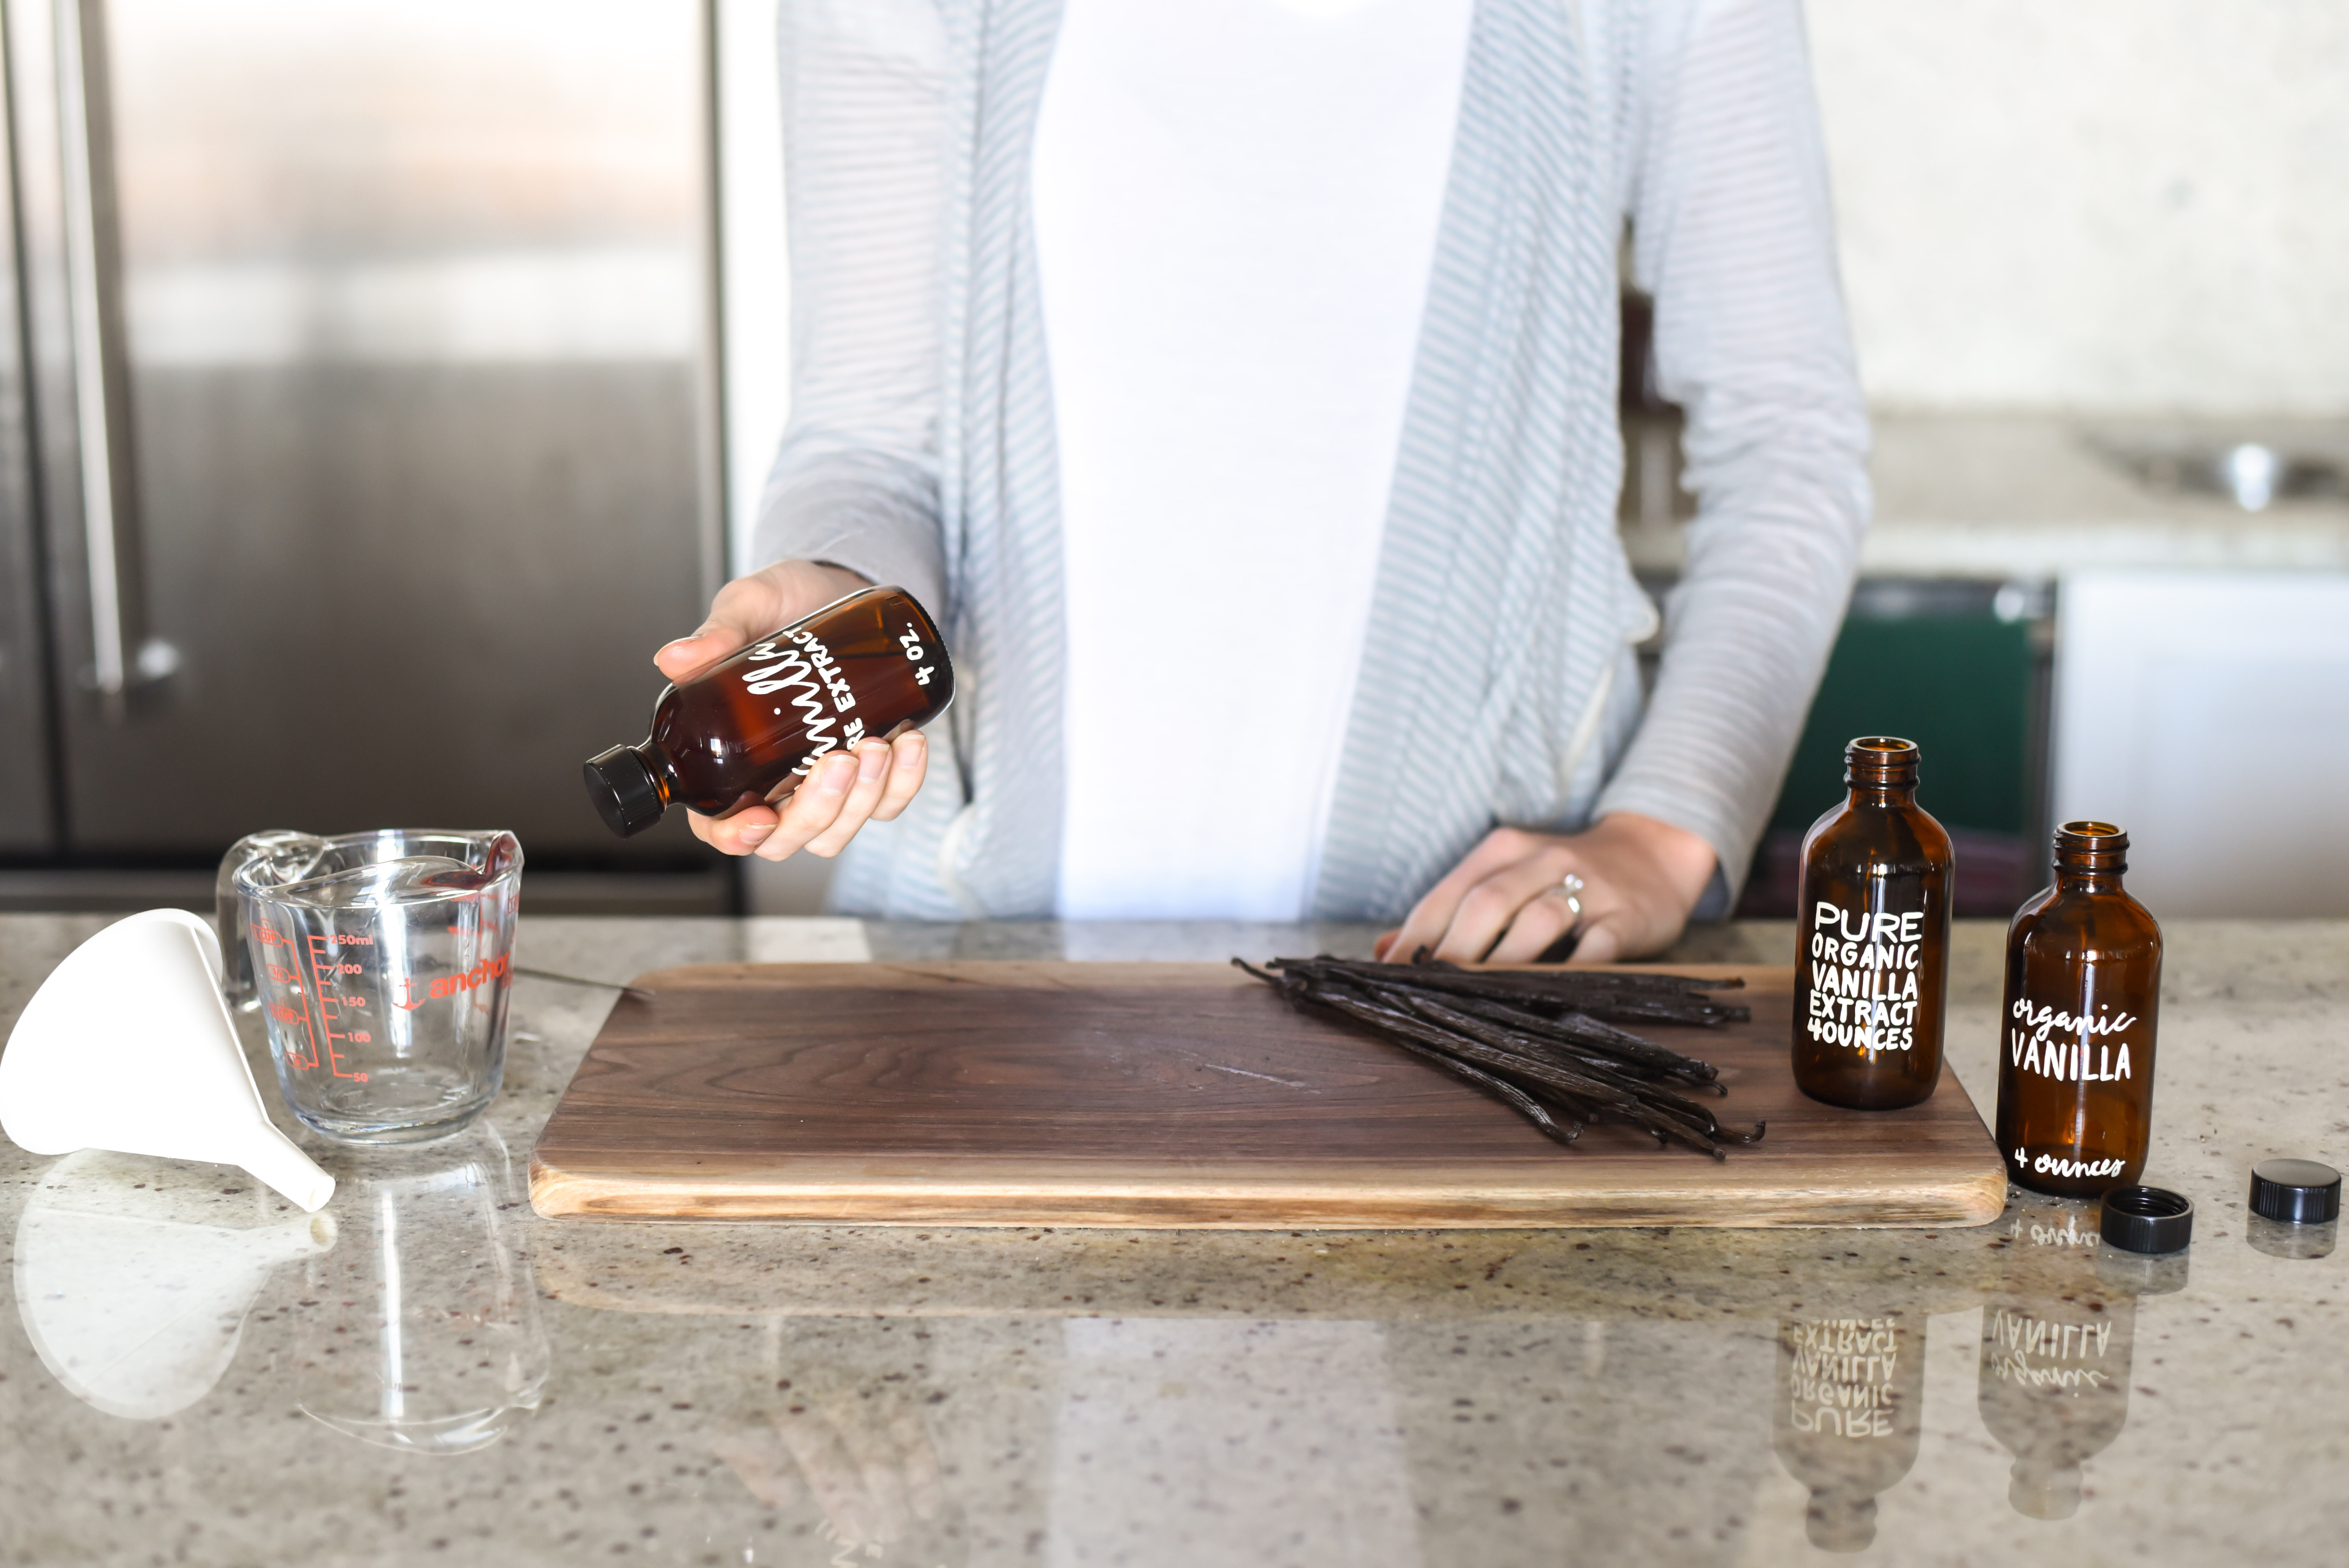
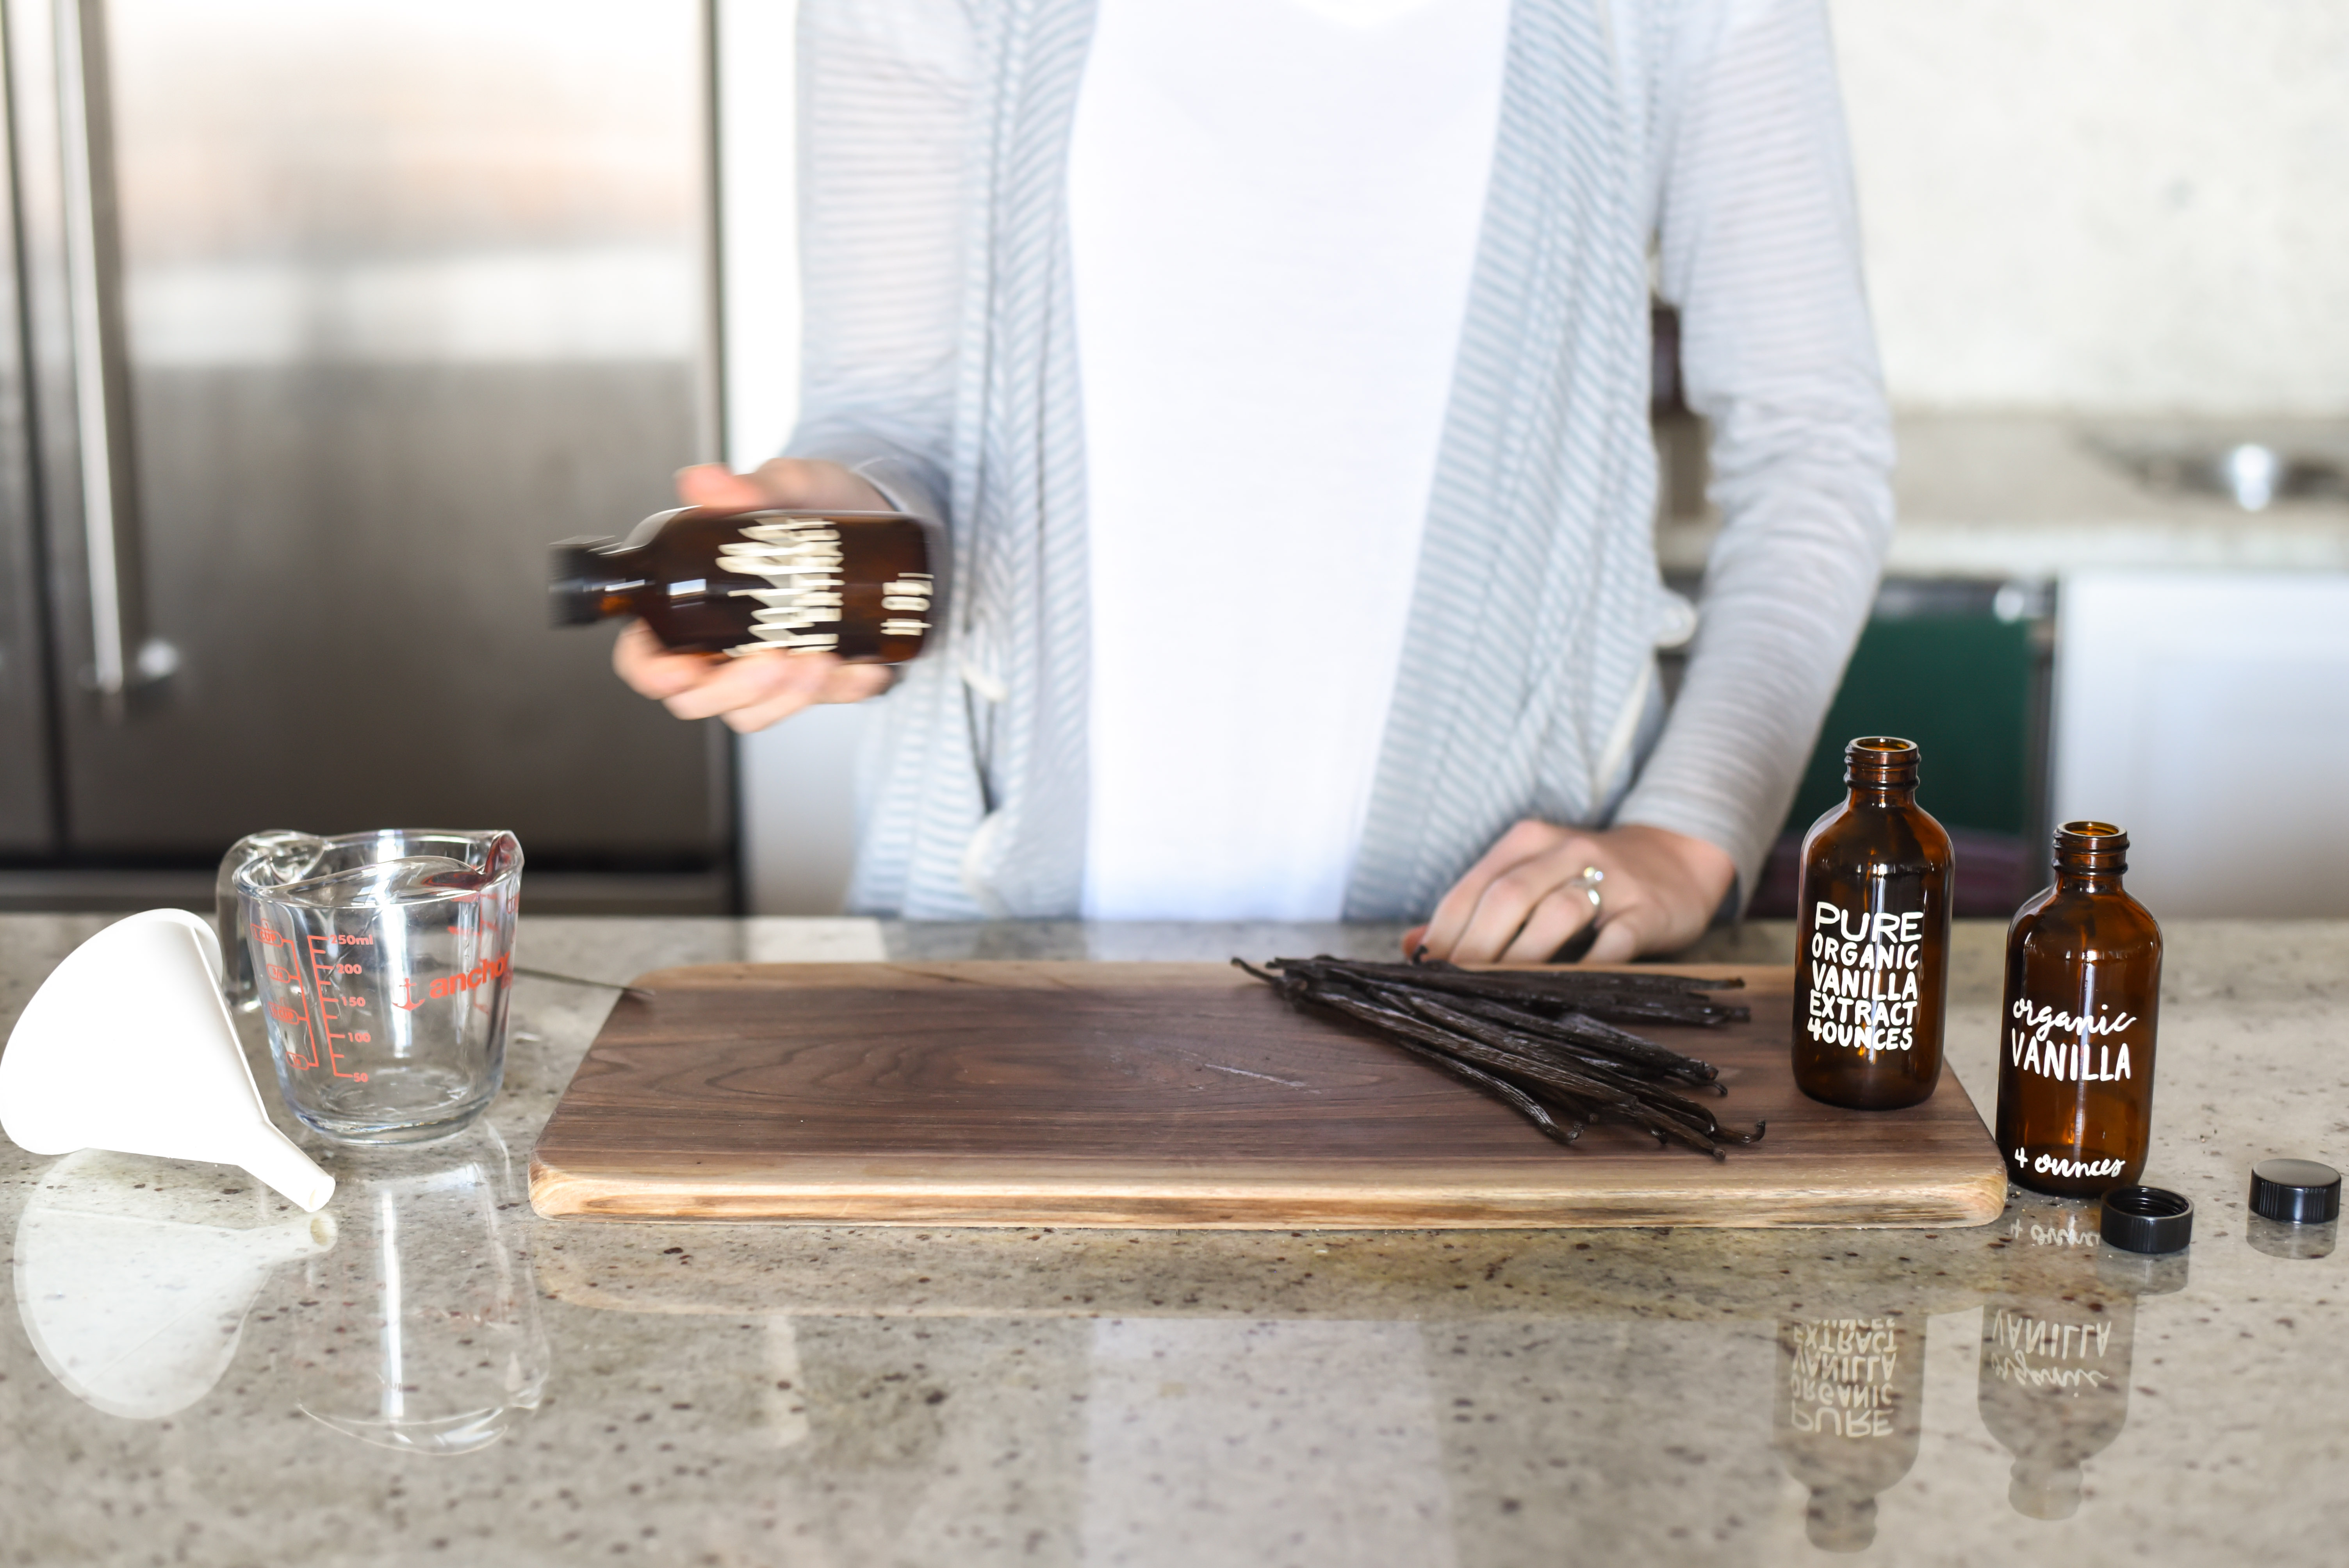
- If painting the labels, I recommend doing so before filling the bottles.
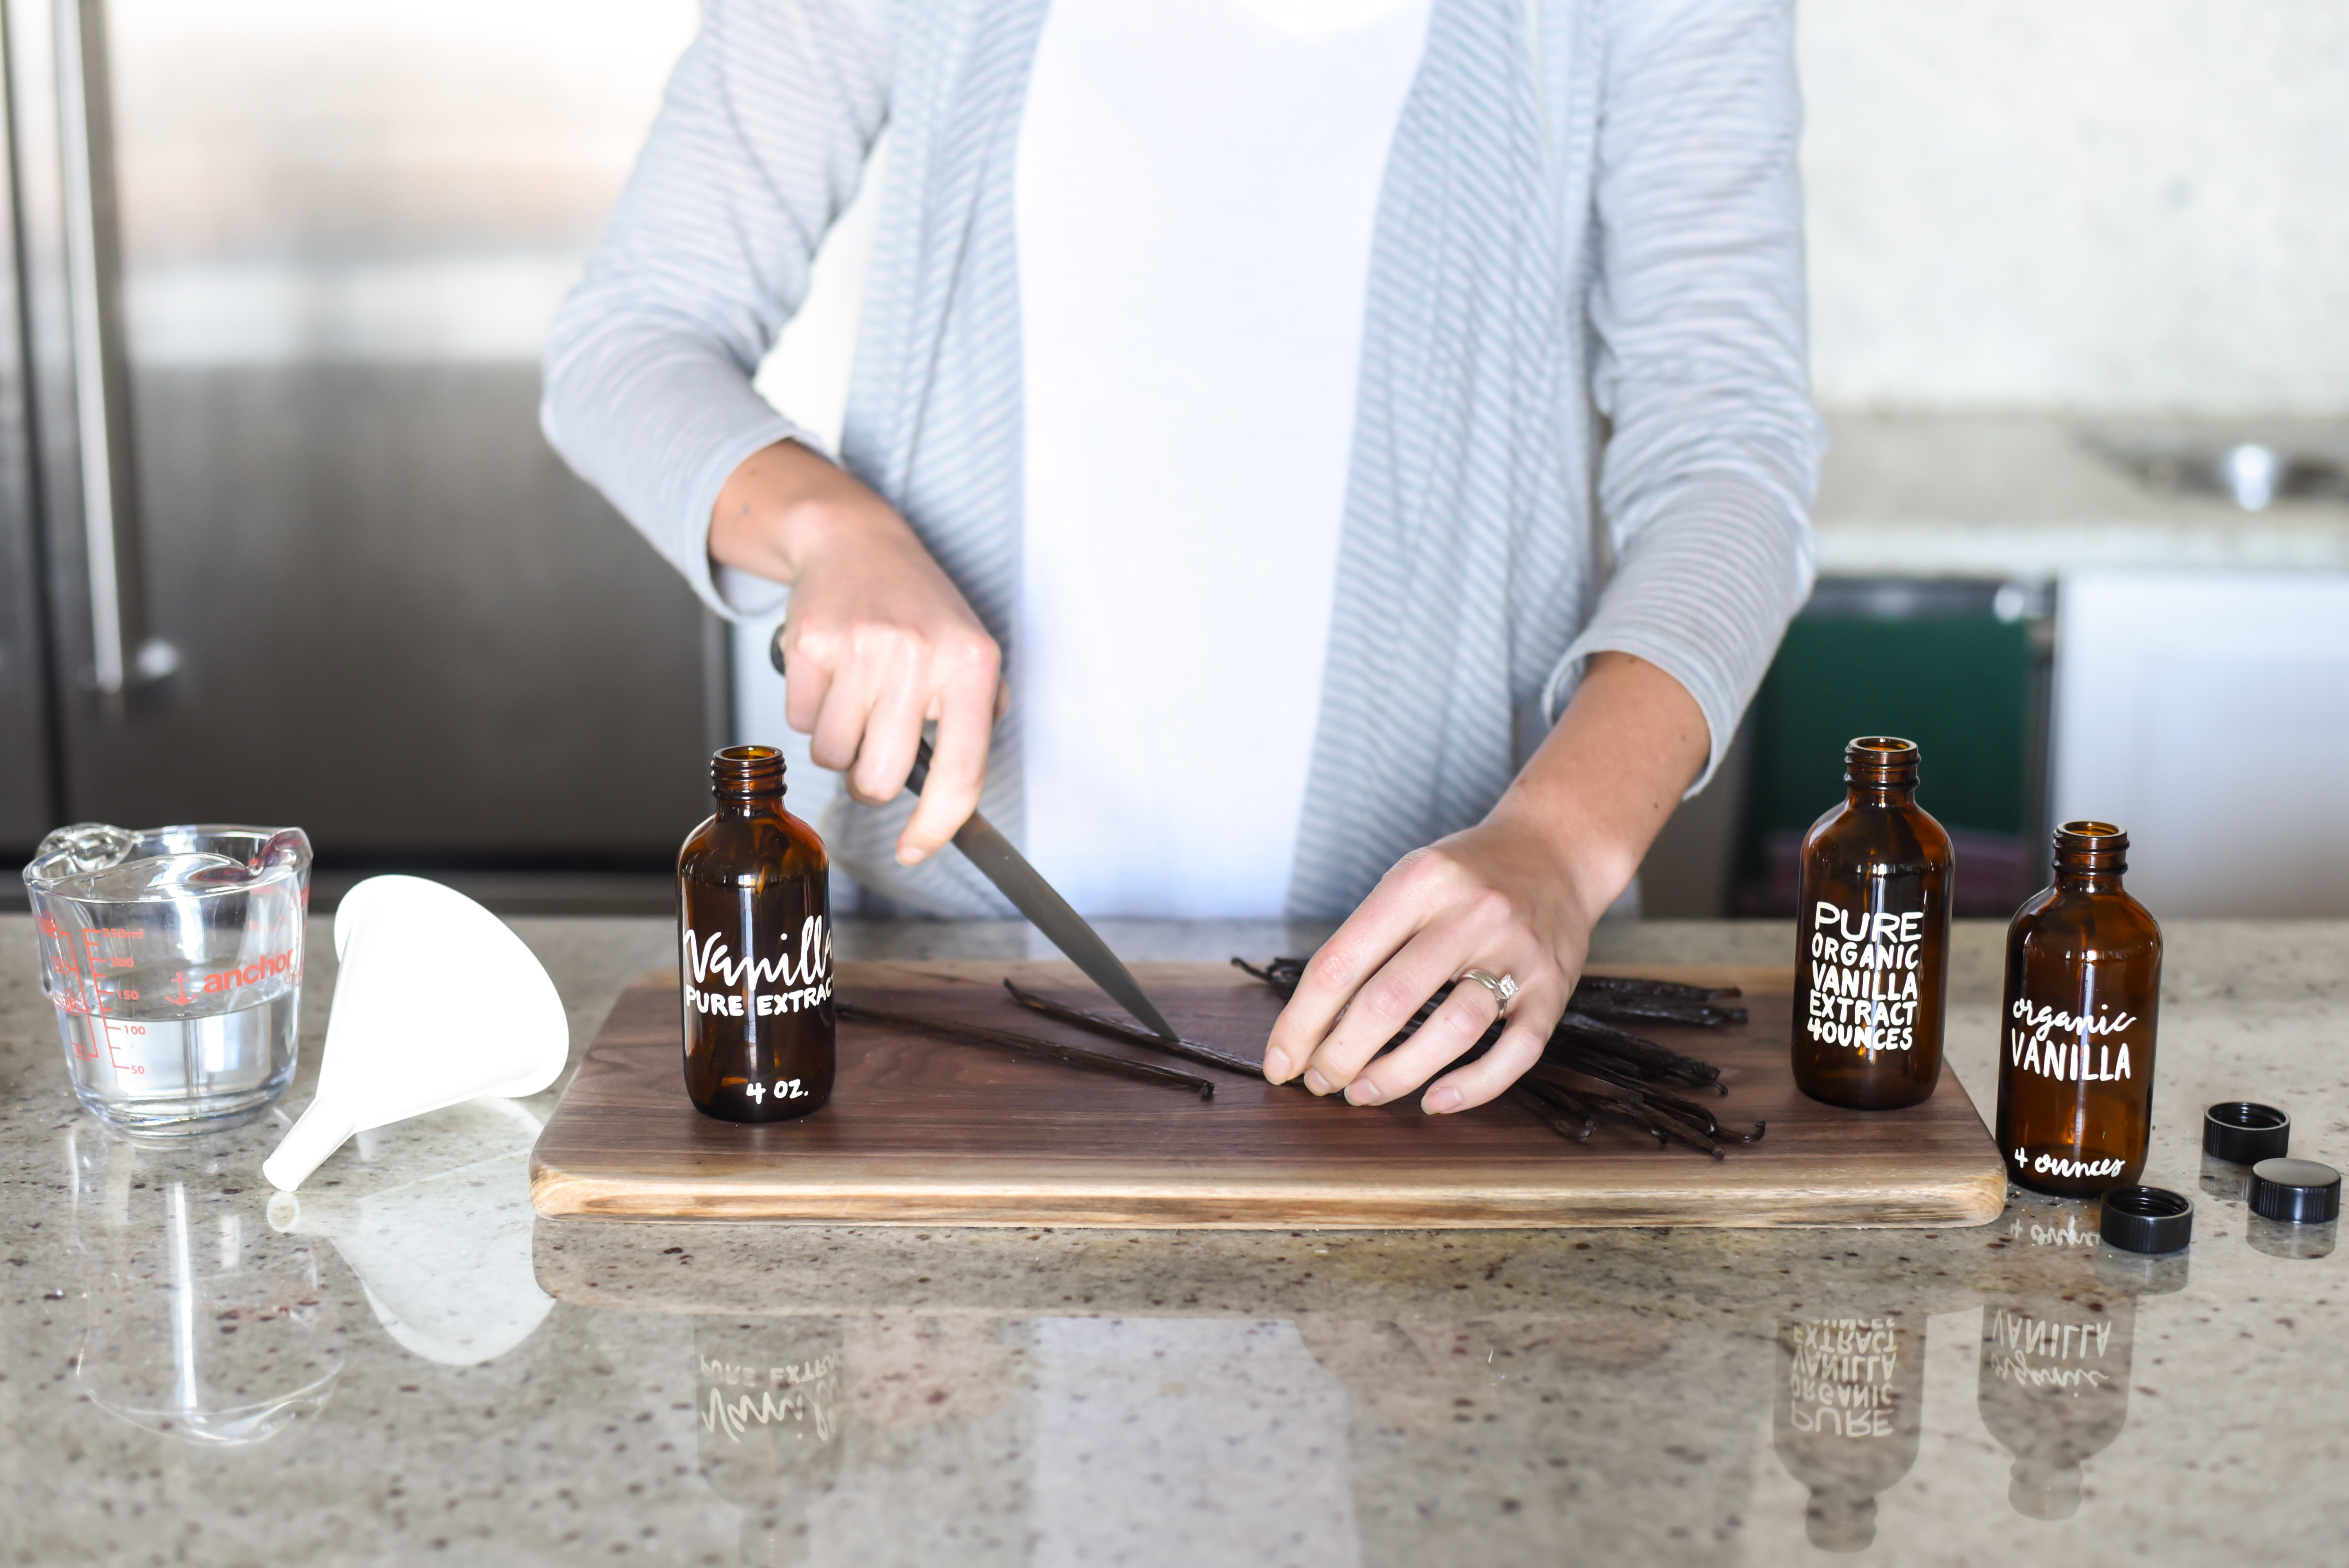
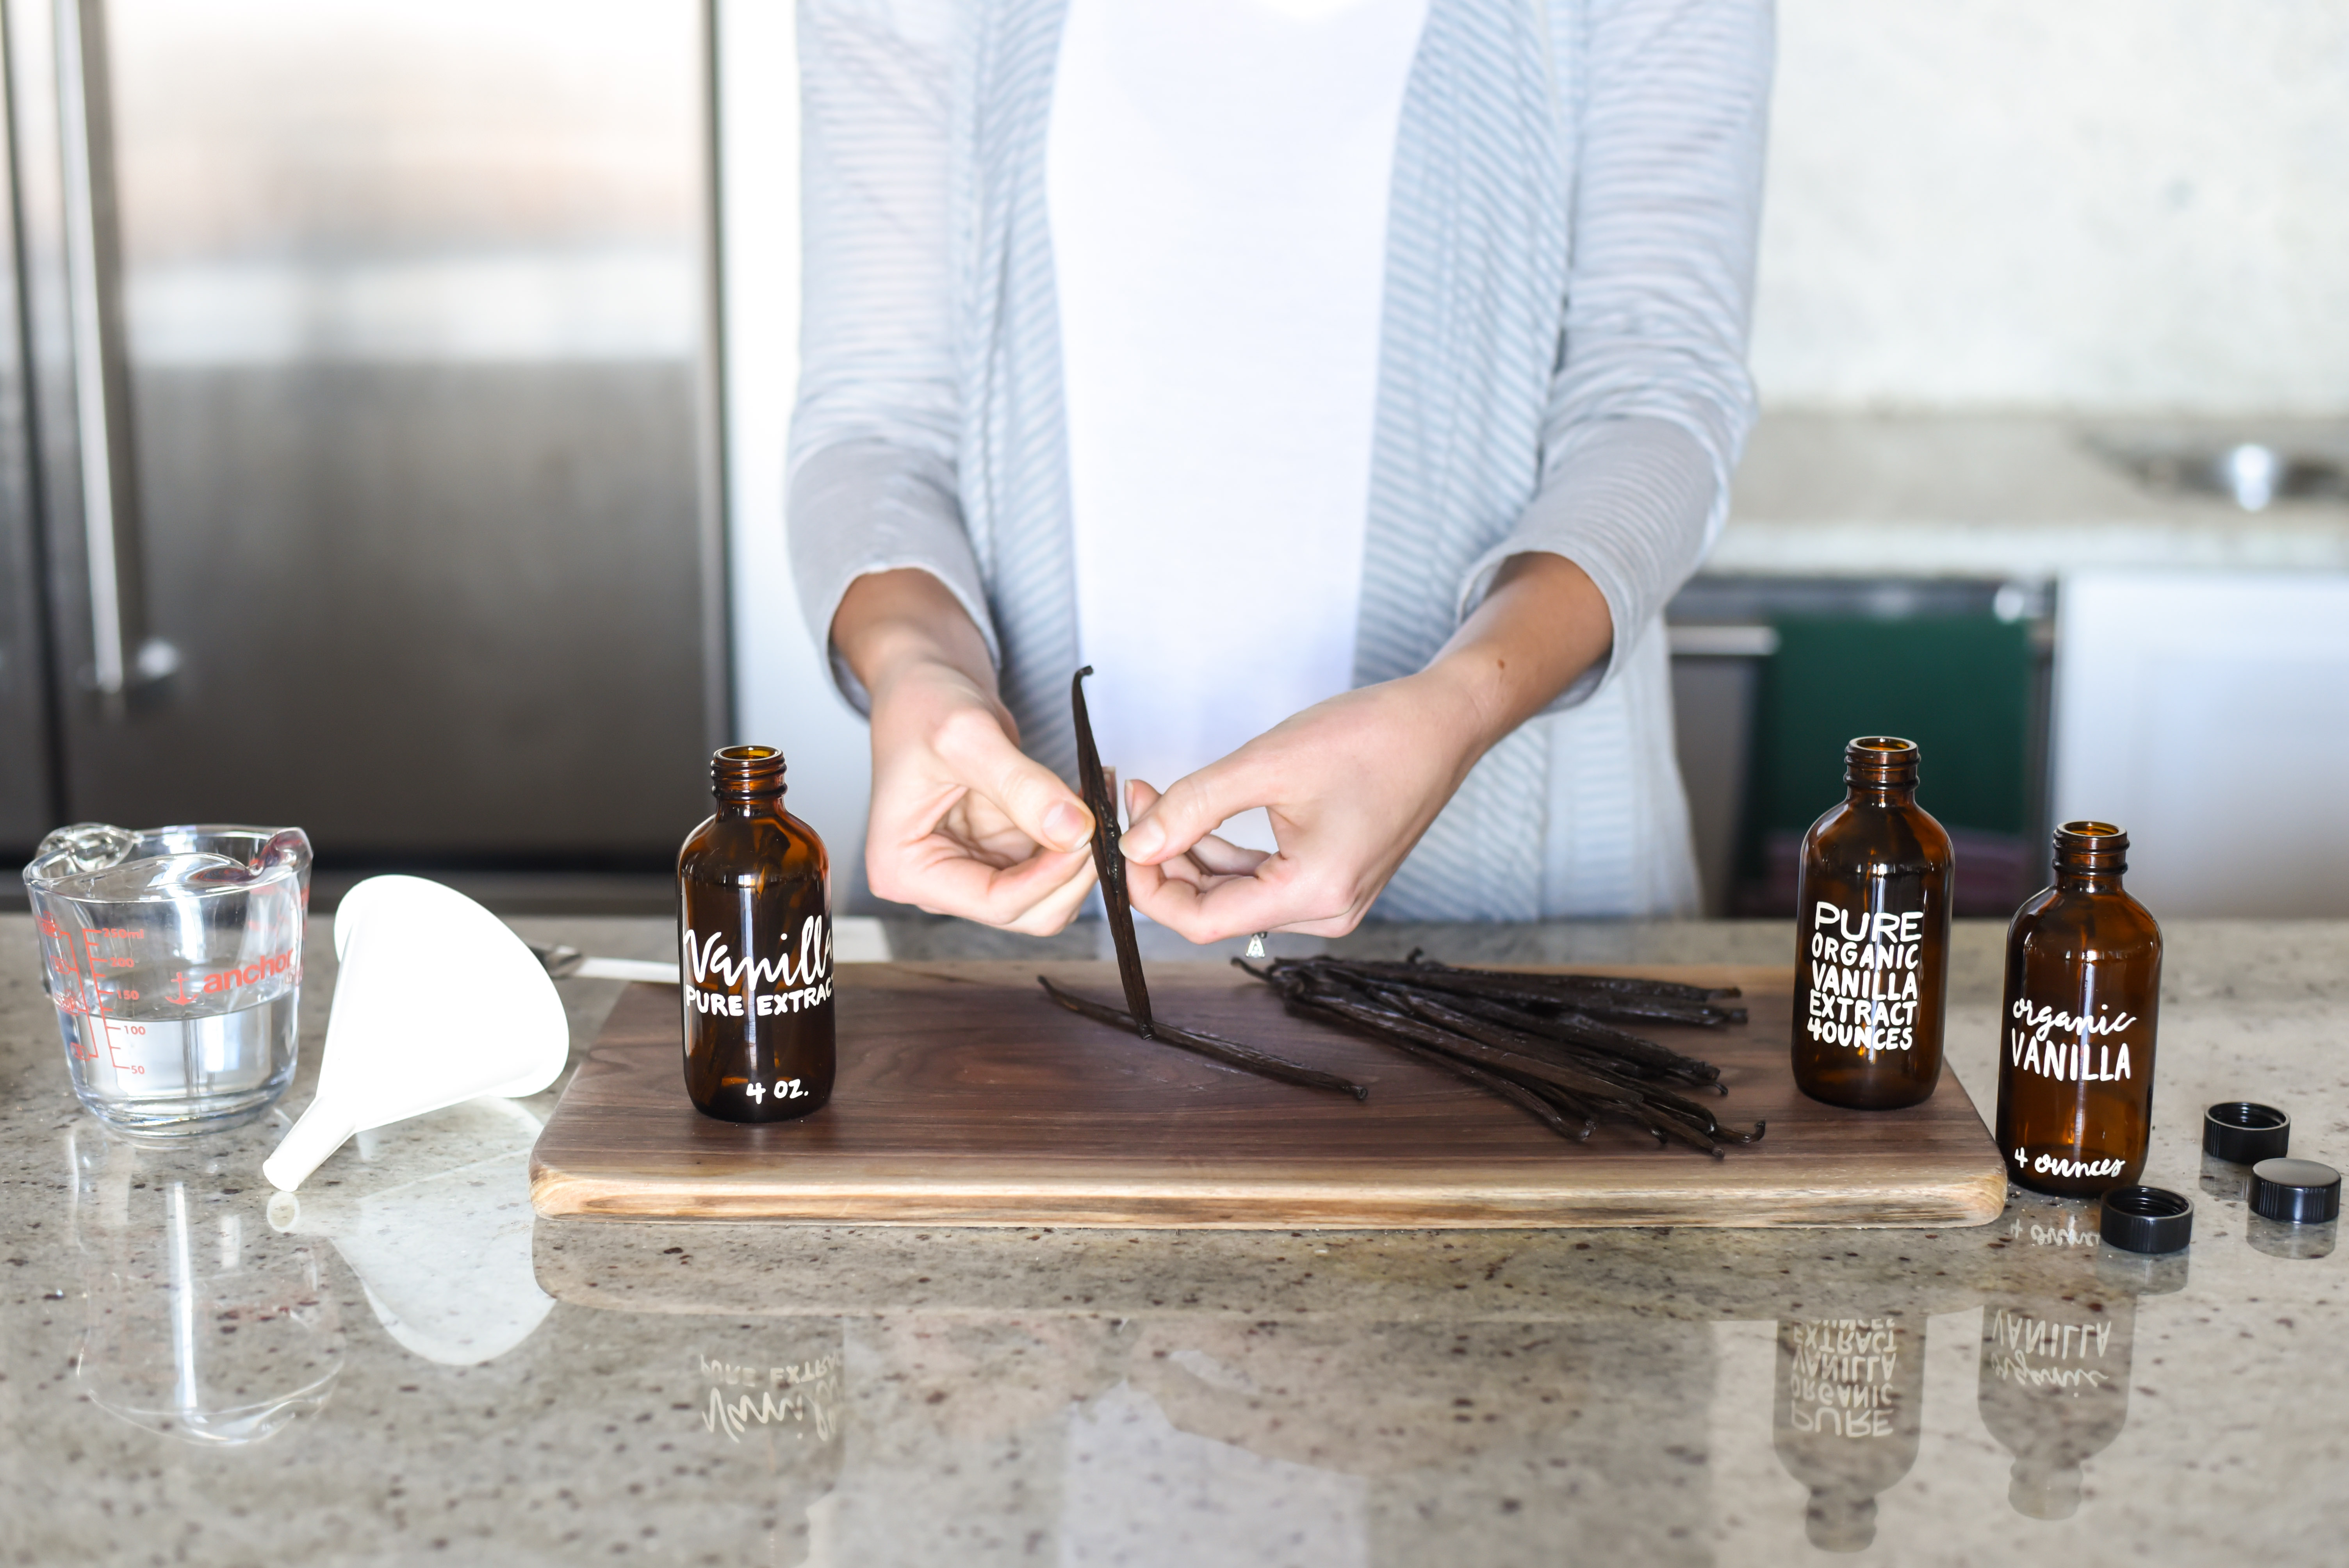
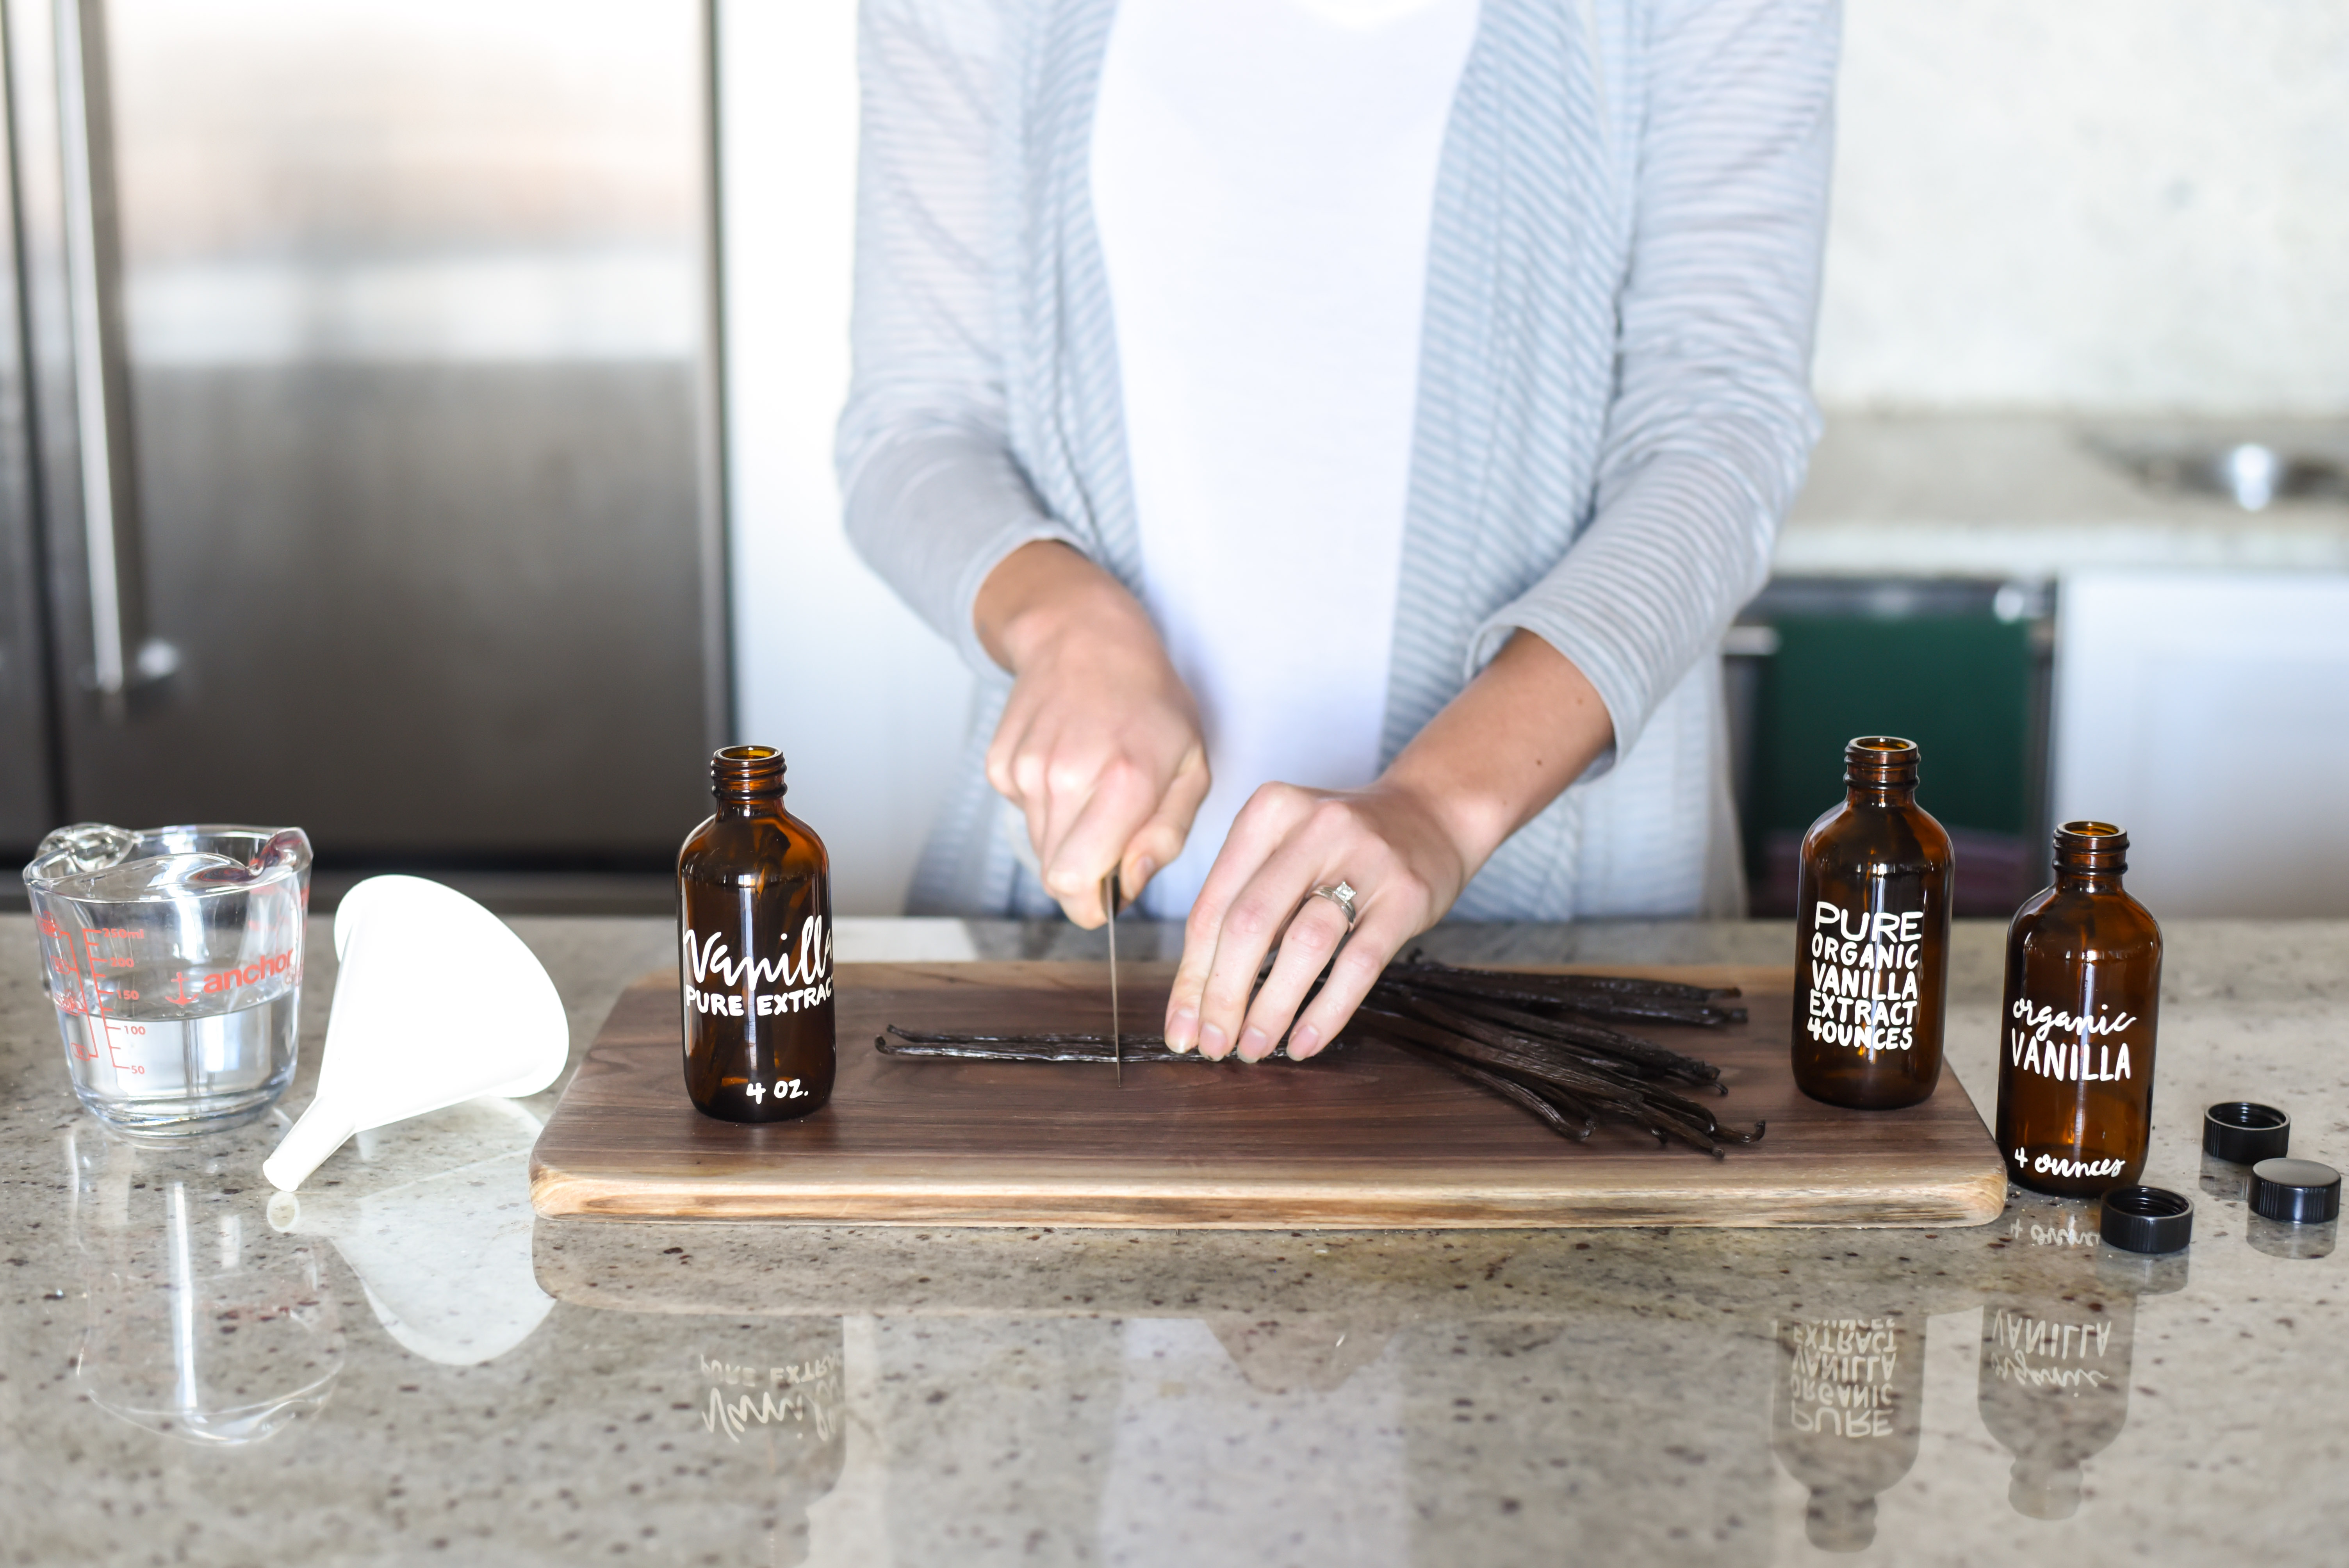
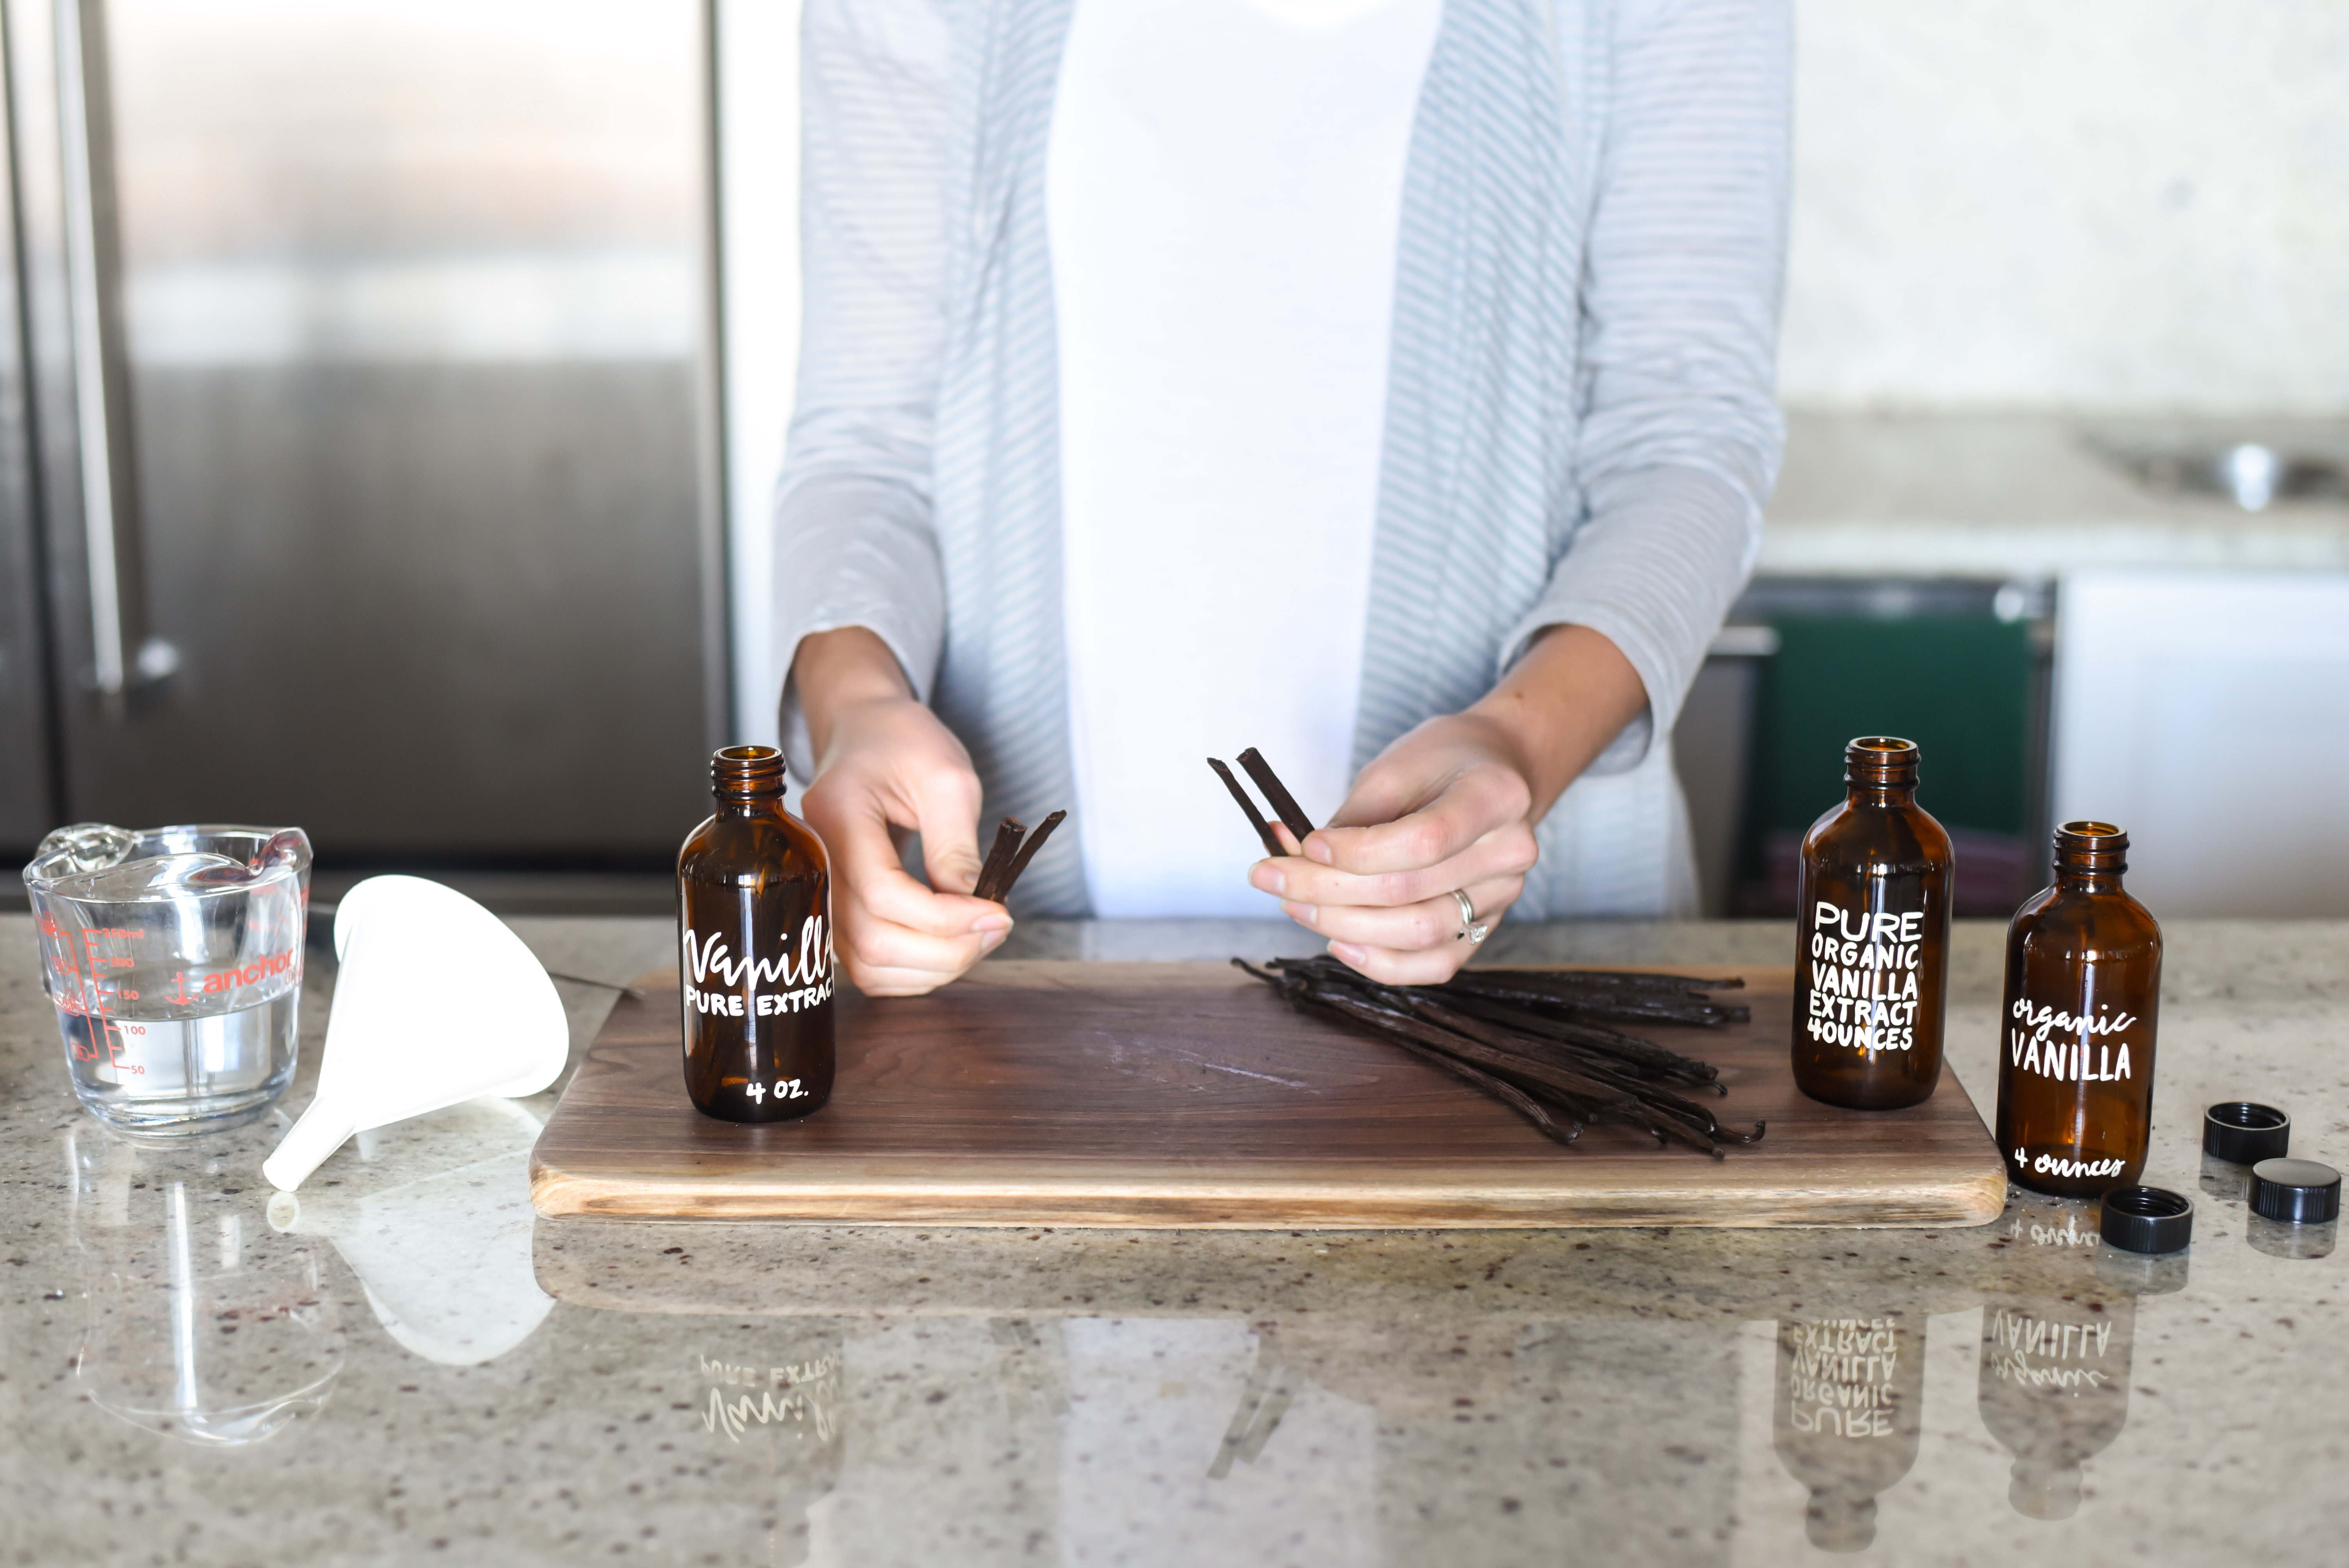
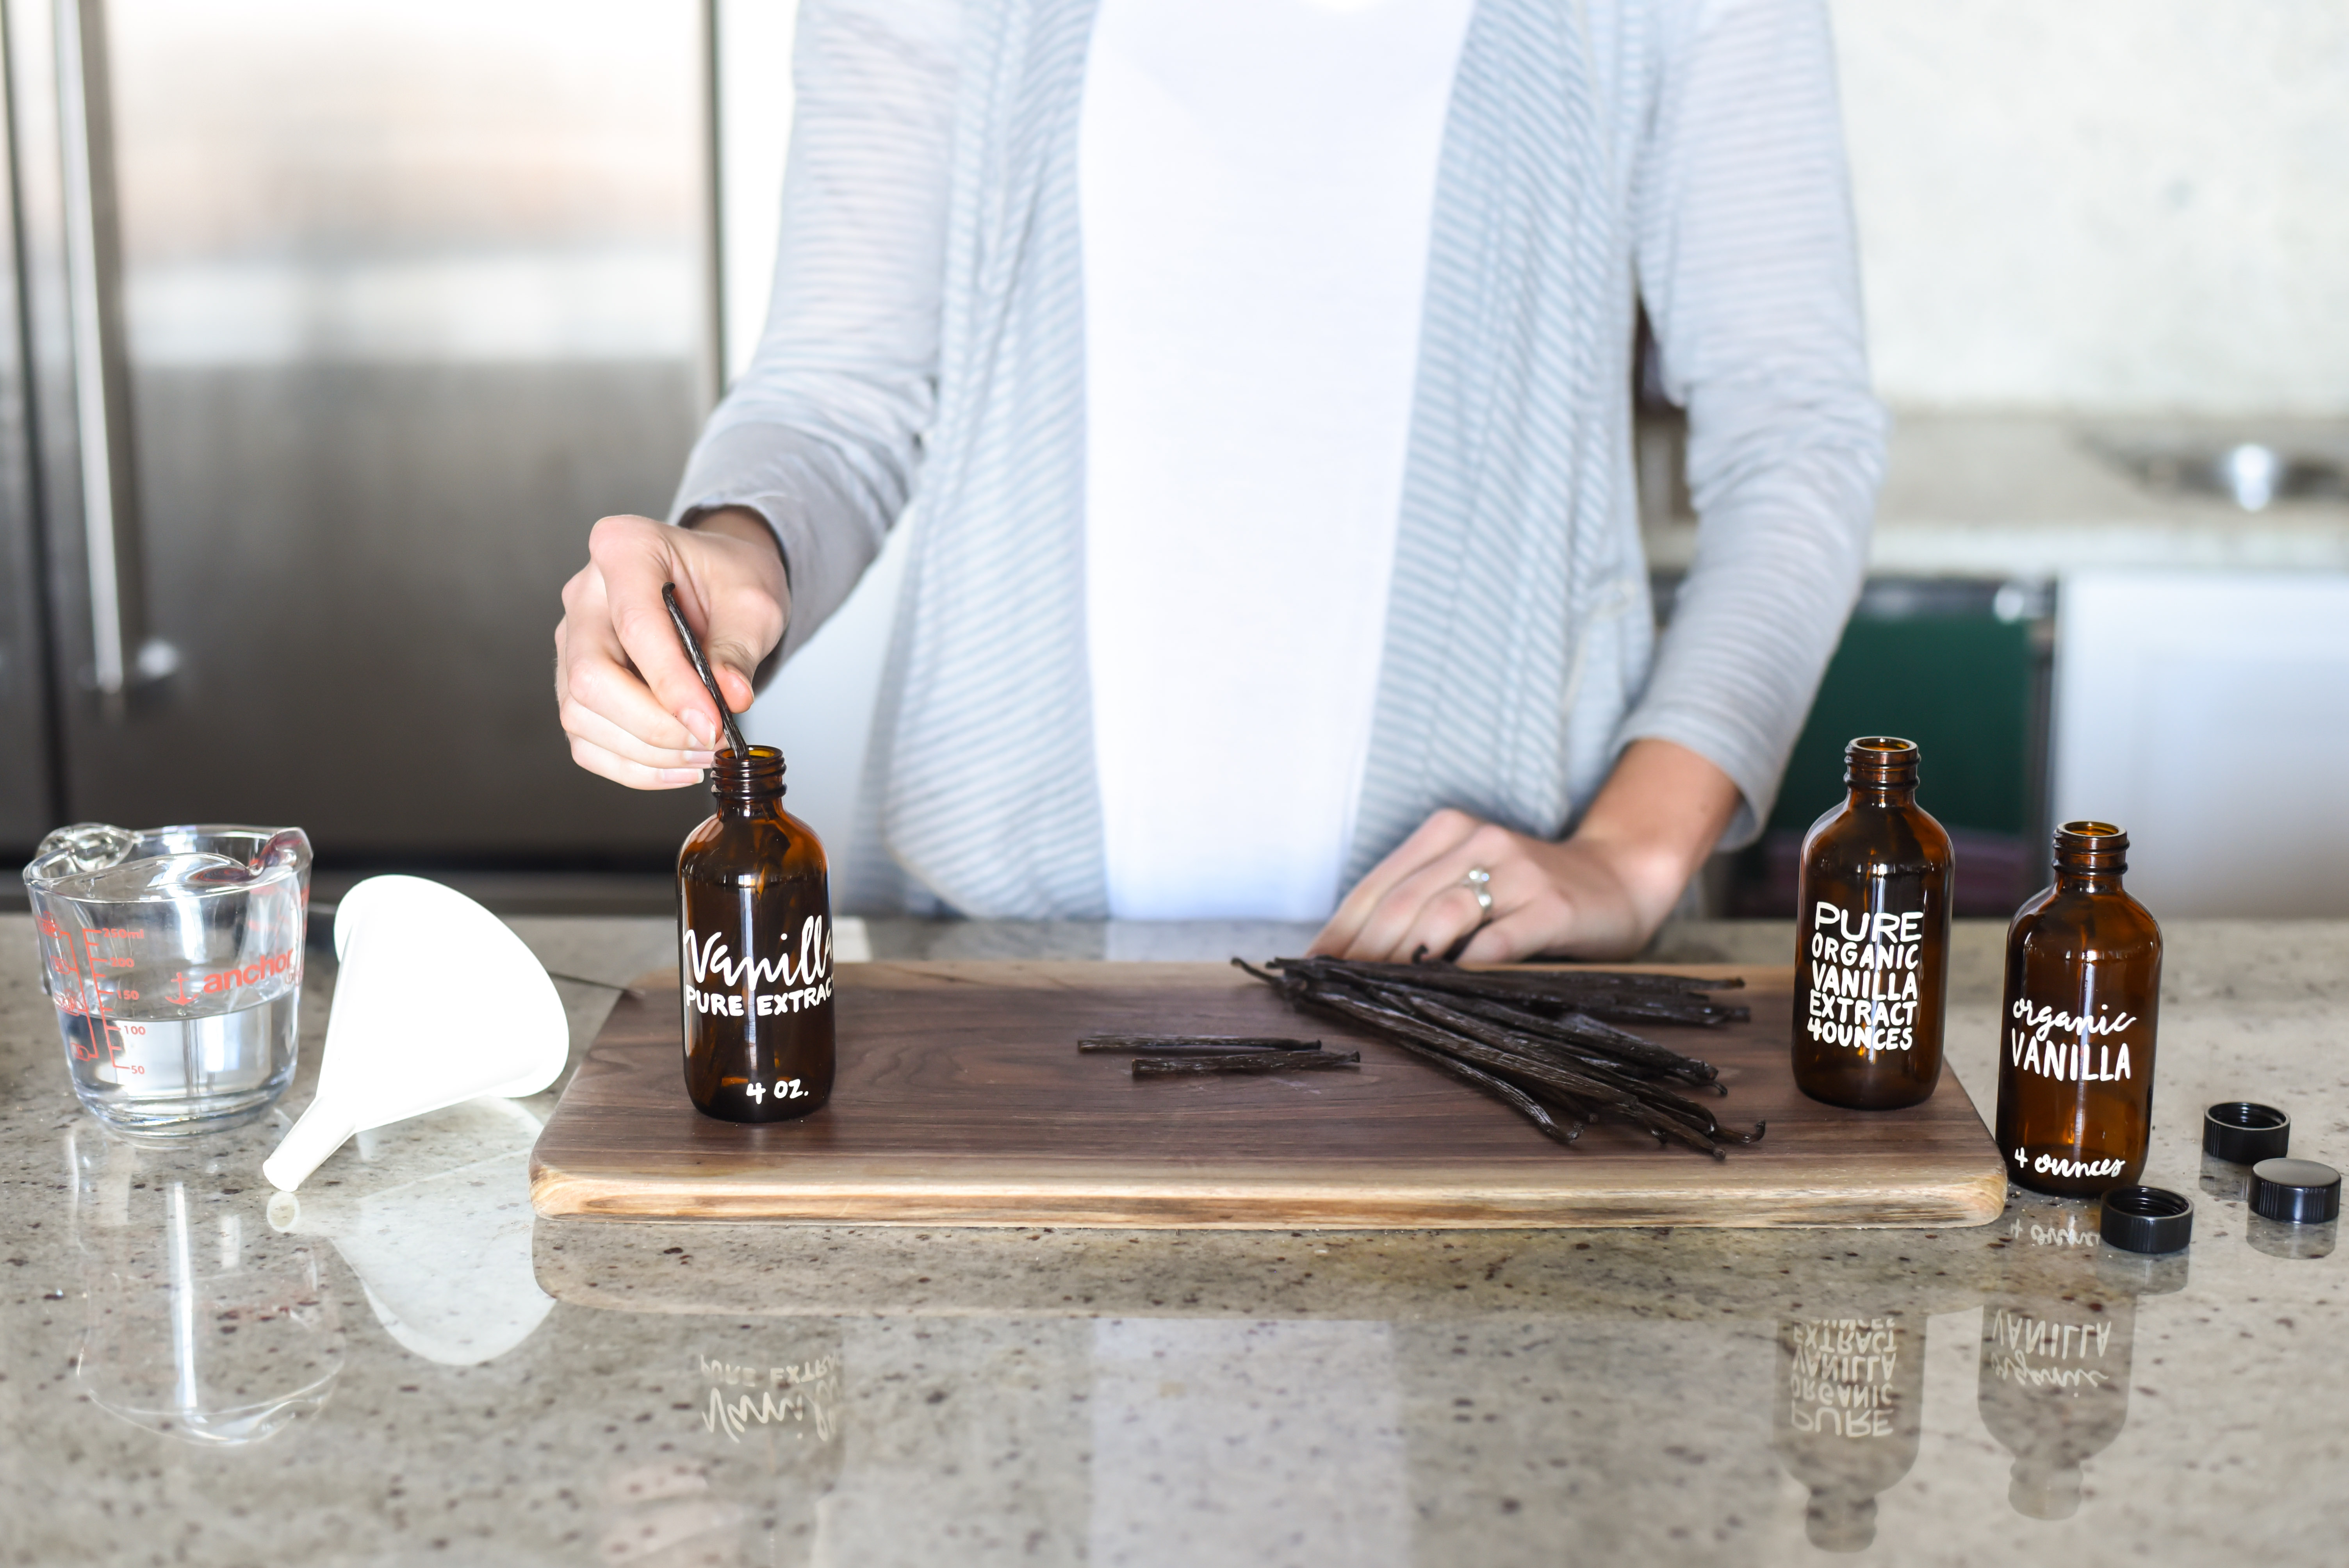
- Slice two vanilla beans lengthwise with a paring knife, trying not to cut all the way through. Gently open beans to reveal vanillin inside, then cut in half crosswise. Place four halves in a 4 oz. bottle, then fill with 4 oz. vodka. Screw lid on tightly, then shake bottle. Repeat with remaining bottles. Add sticker labels if desired.
- For best results, let extract sit in a cool, dark place for at least 2-4 weeks before using.
To seal with wax:
- Put about ½ cup sealing wax beads in a clean tin can. Bring a pot with 1-2” water to a steady simmer. Place can inside and stir periodically with a wooden skewer until completely melted, 5-10 minutes.
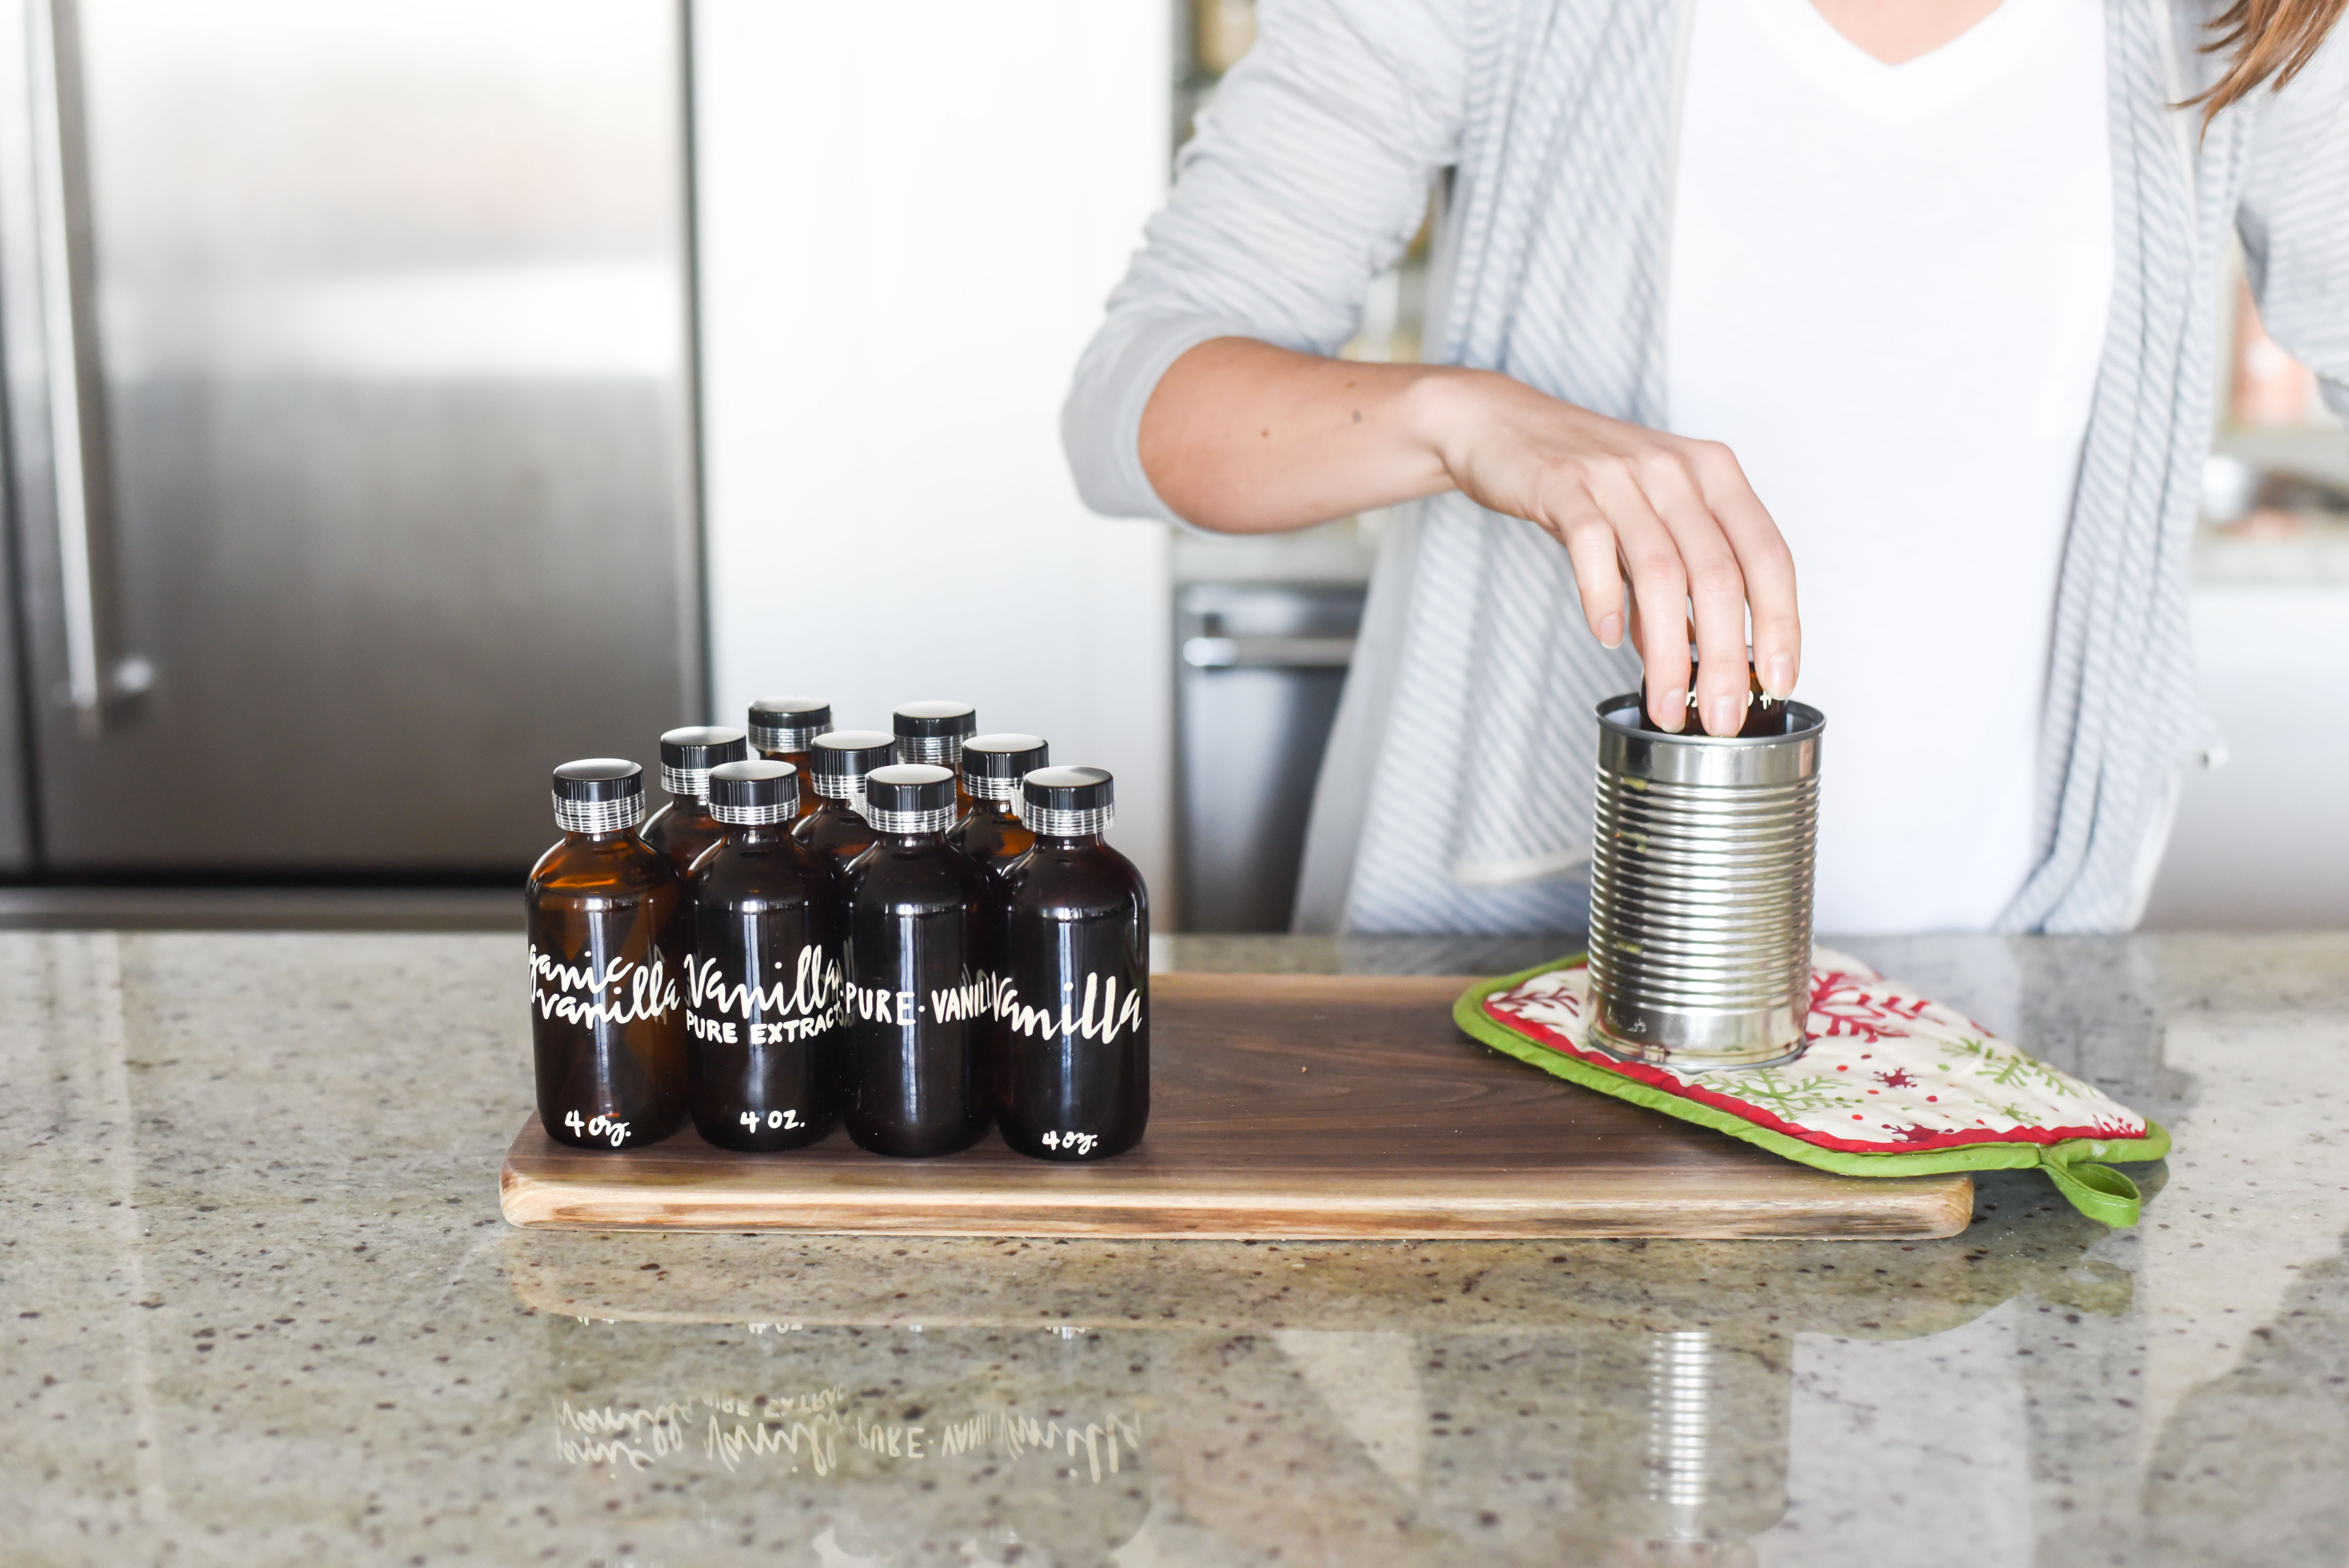
- Meanwhile, cut a strip of filament tape that’s about 1” longer than the circumference of the lids. Place the tape around the bottom of the lid until it overlaps slightly, then fold the end on itself to create a tab. Repeat with all bottles.
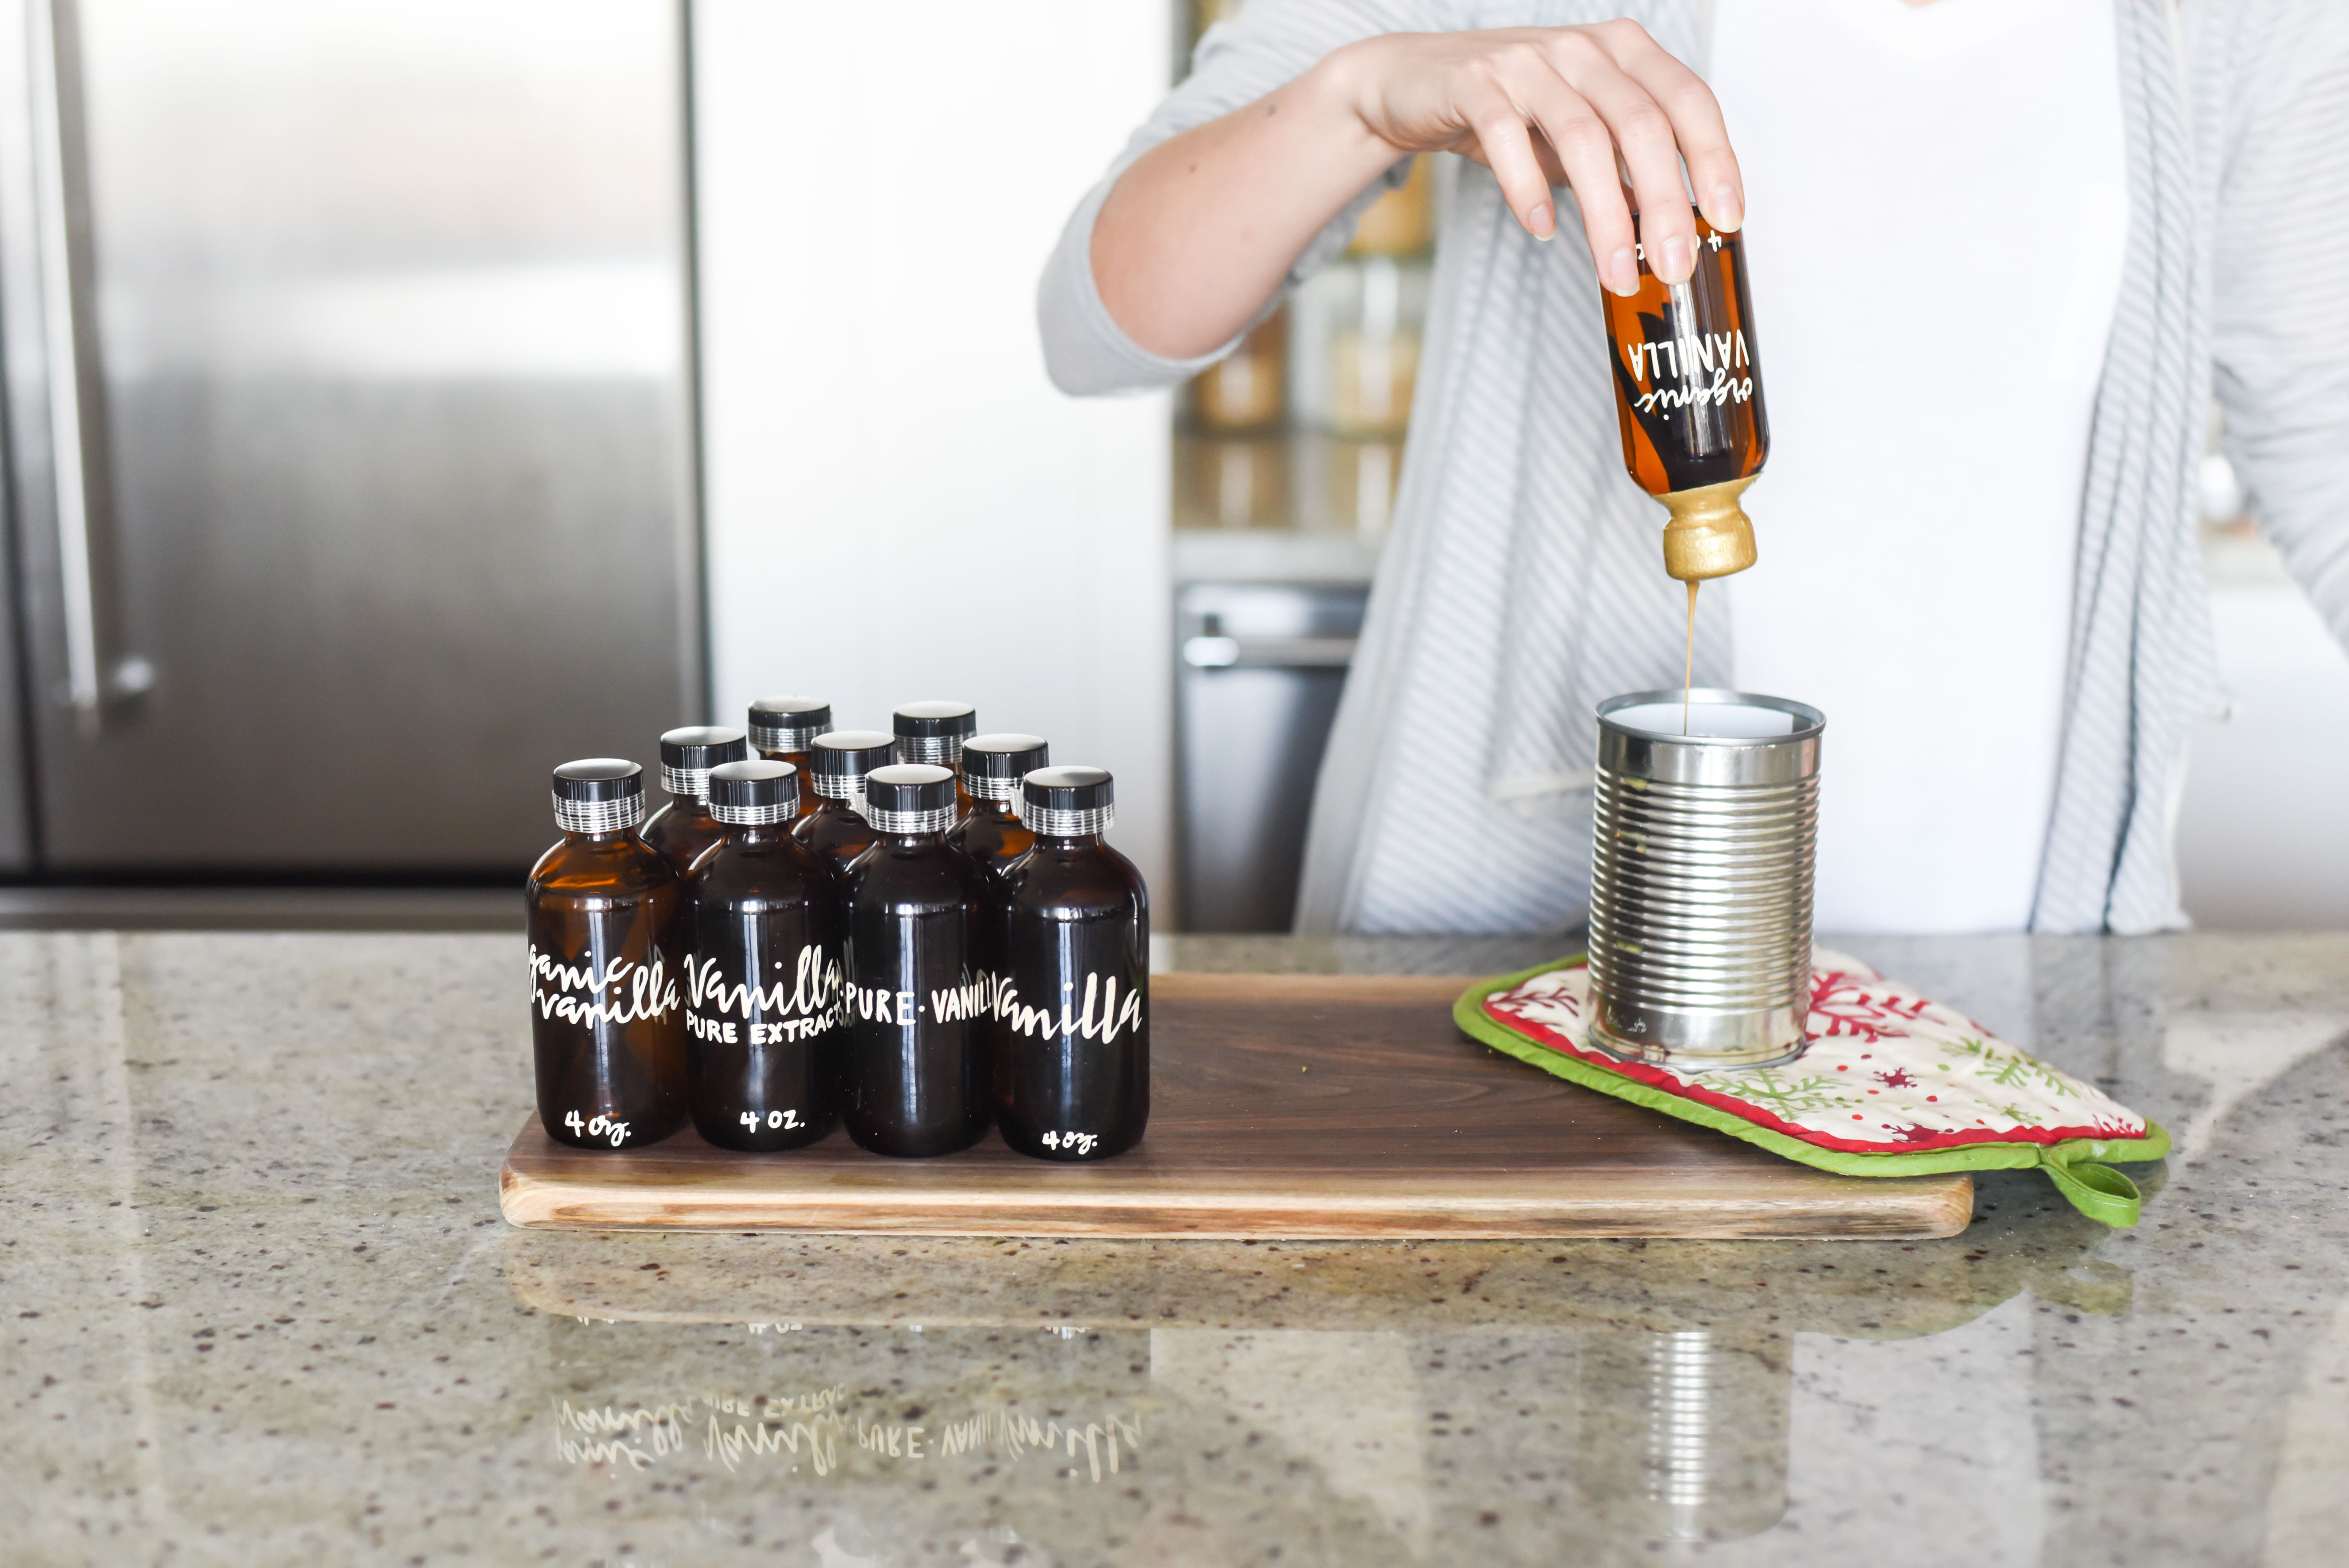
- When the wax is completely melted, dip a bottle into the wax up to the neck. Allow excess wax to drip off, then place bottle right side up. (You can try to go for a wax-dripping-down-the-bottle effect, but I found it challenging.) Repeat with remaining bottles, reheating wax in water bath as necessary.
Notes
For larger bottles, use the ratio of 4 vanilla beans for each cup (8 oz.) of liquid.
*This page contains affiliate links, which means I earn a small commission if you make a purchase from these links. For more information, see my disclosures page.
You can dilute your vanilla extract that you made with Everclear. However much you have, dilute with an equal amount of water, 50/50. That’s it.